How am I supposed to start?
You can register on Witcloud at this link. It is recommended that 1 person create an account on the platform and then send invitations to the project to others in the organization.
✅ Creating a Project in WitCloud
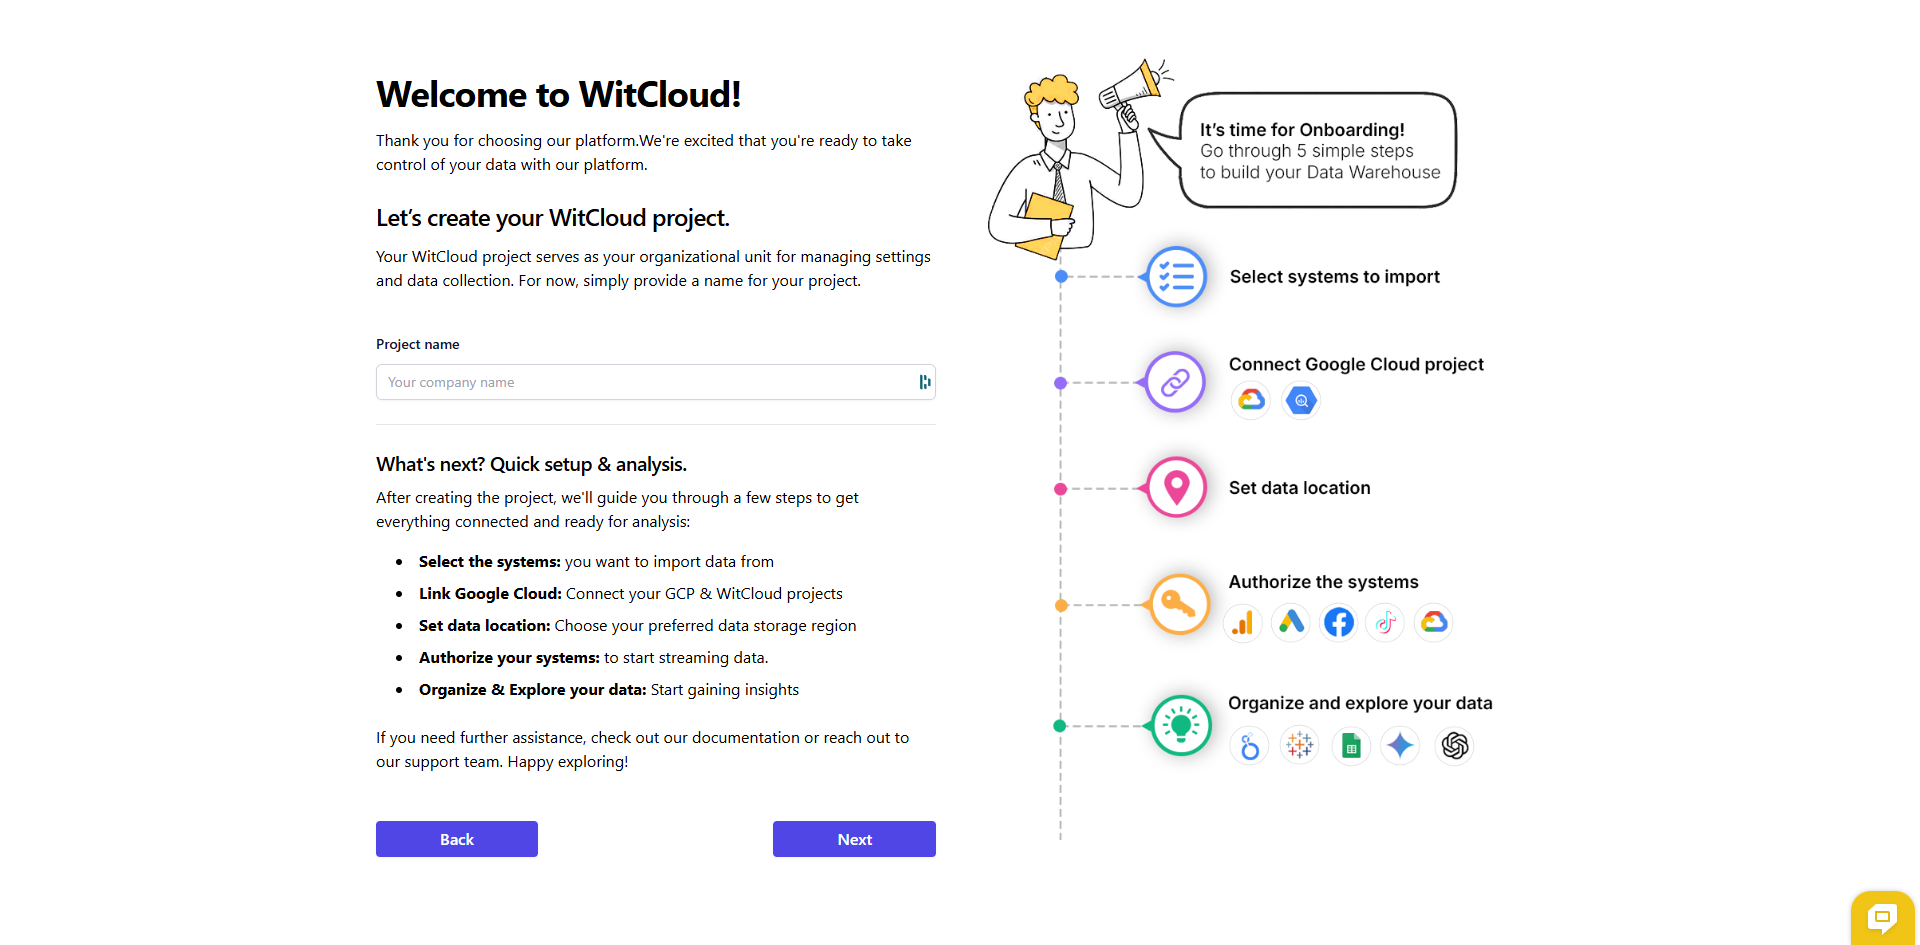
Once you have successfully registered, verified your email address, and logged into your WitCloud dashboard for the first time, you will see the view below.
Fill in the first field of the form.
- Name – the project name, which will allow you to find and select the specific project.
Once the form is completed, click Next.
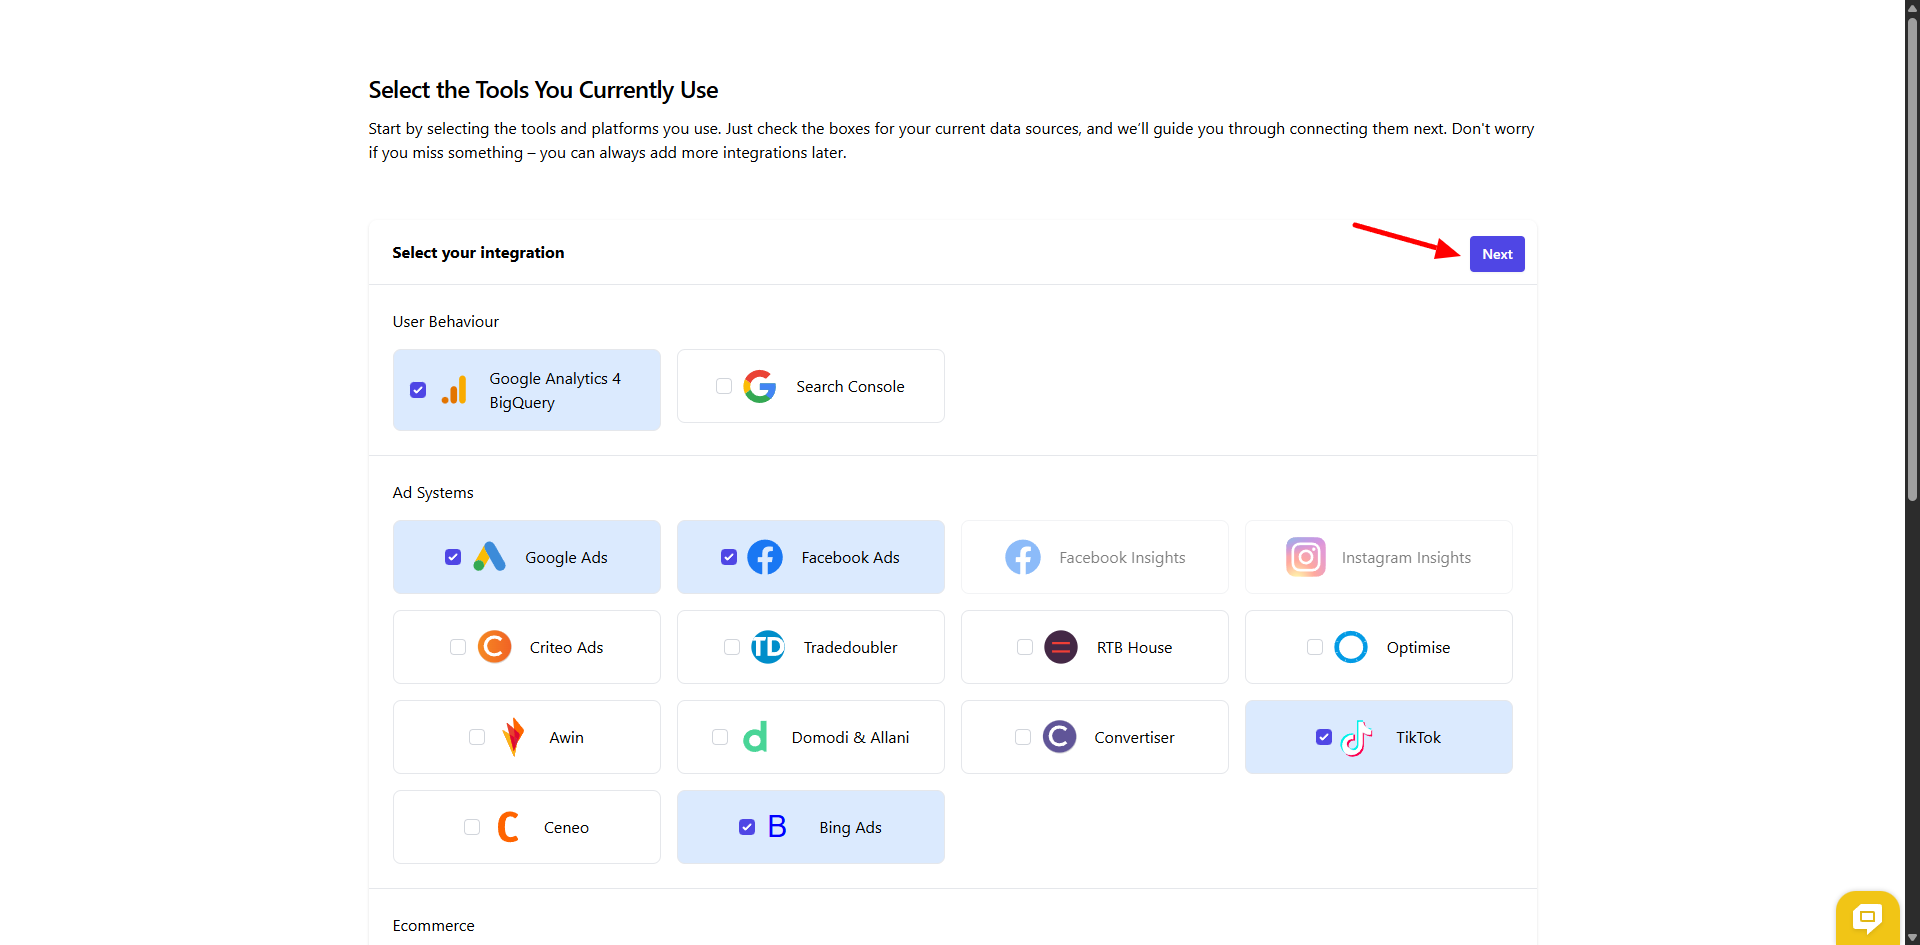
✅ Select the integrations you are interested in.
In this step, select the integrations you're interested in – this will set up an easy onboarding and configuration process for you later.
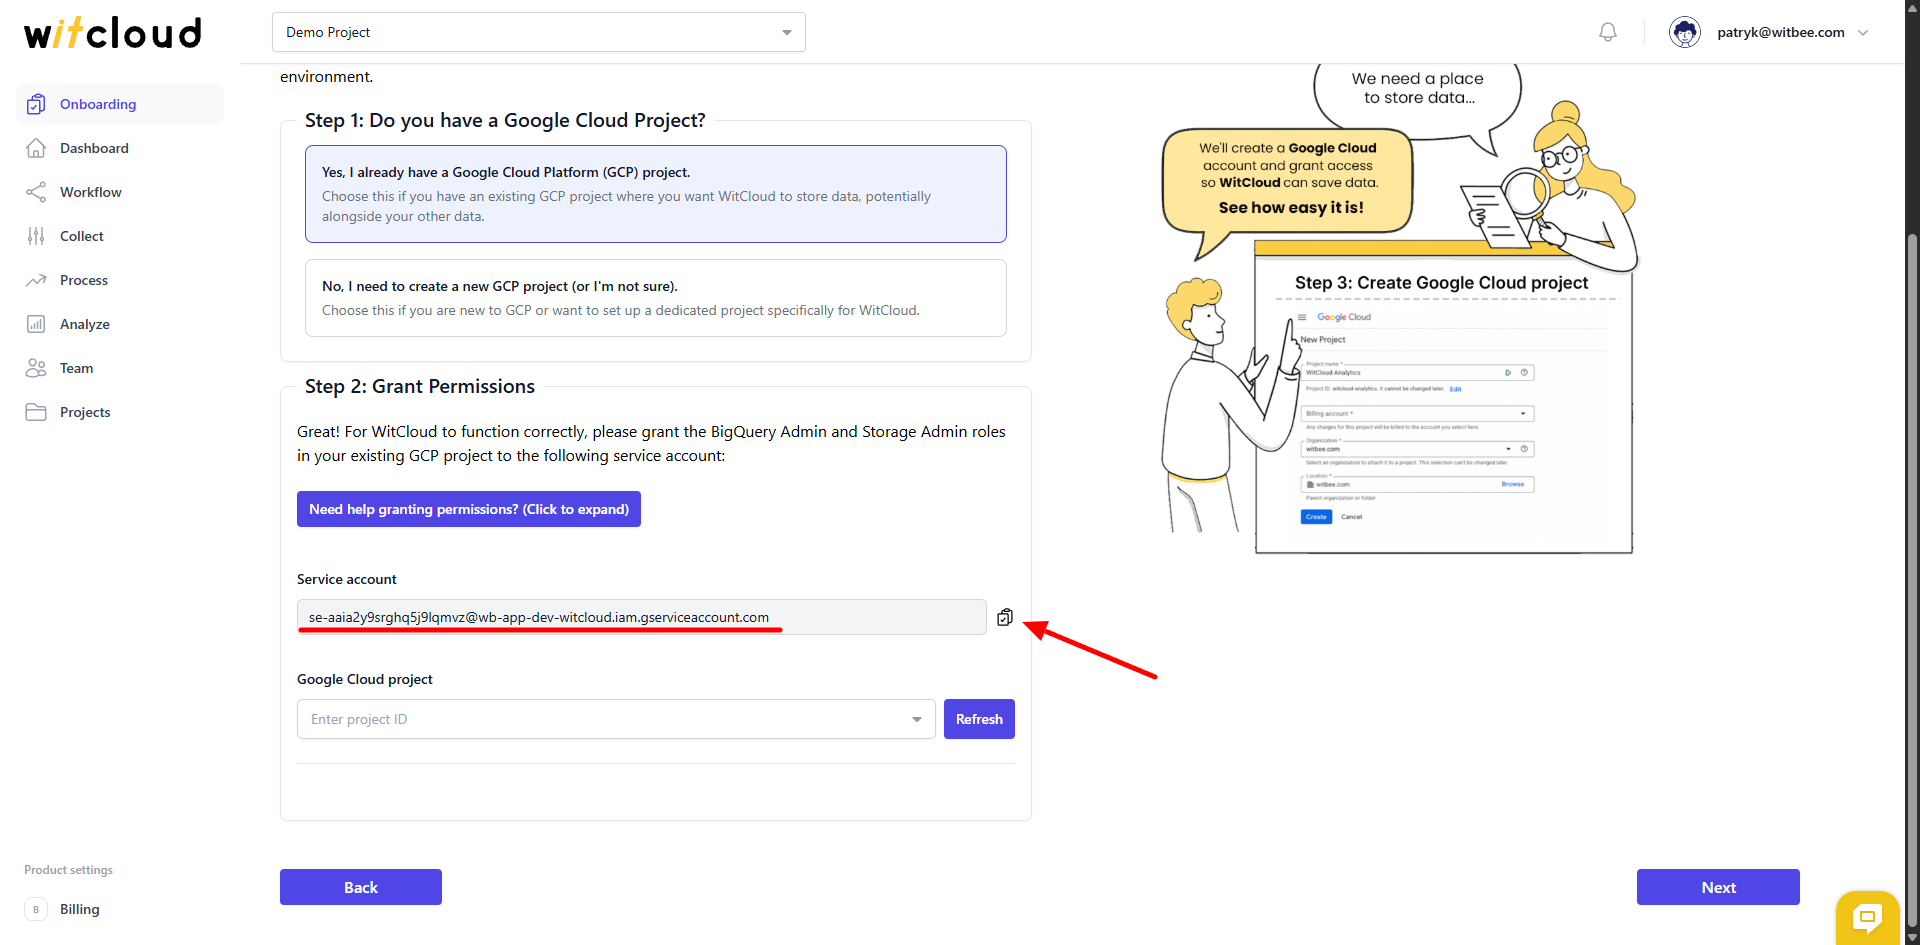
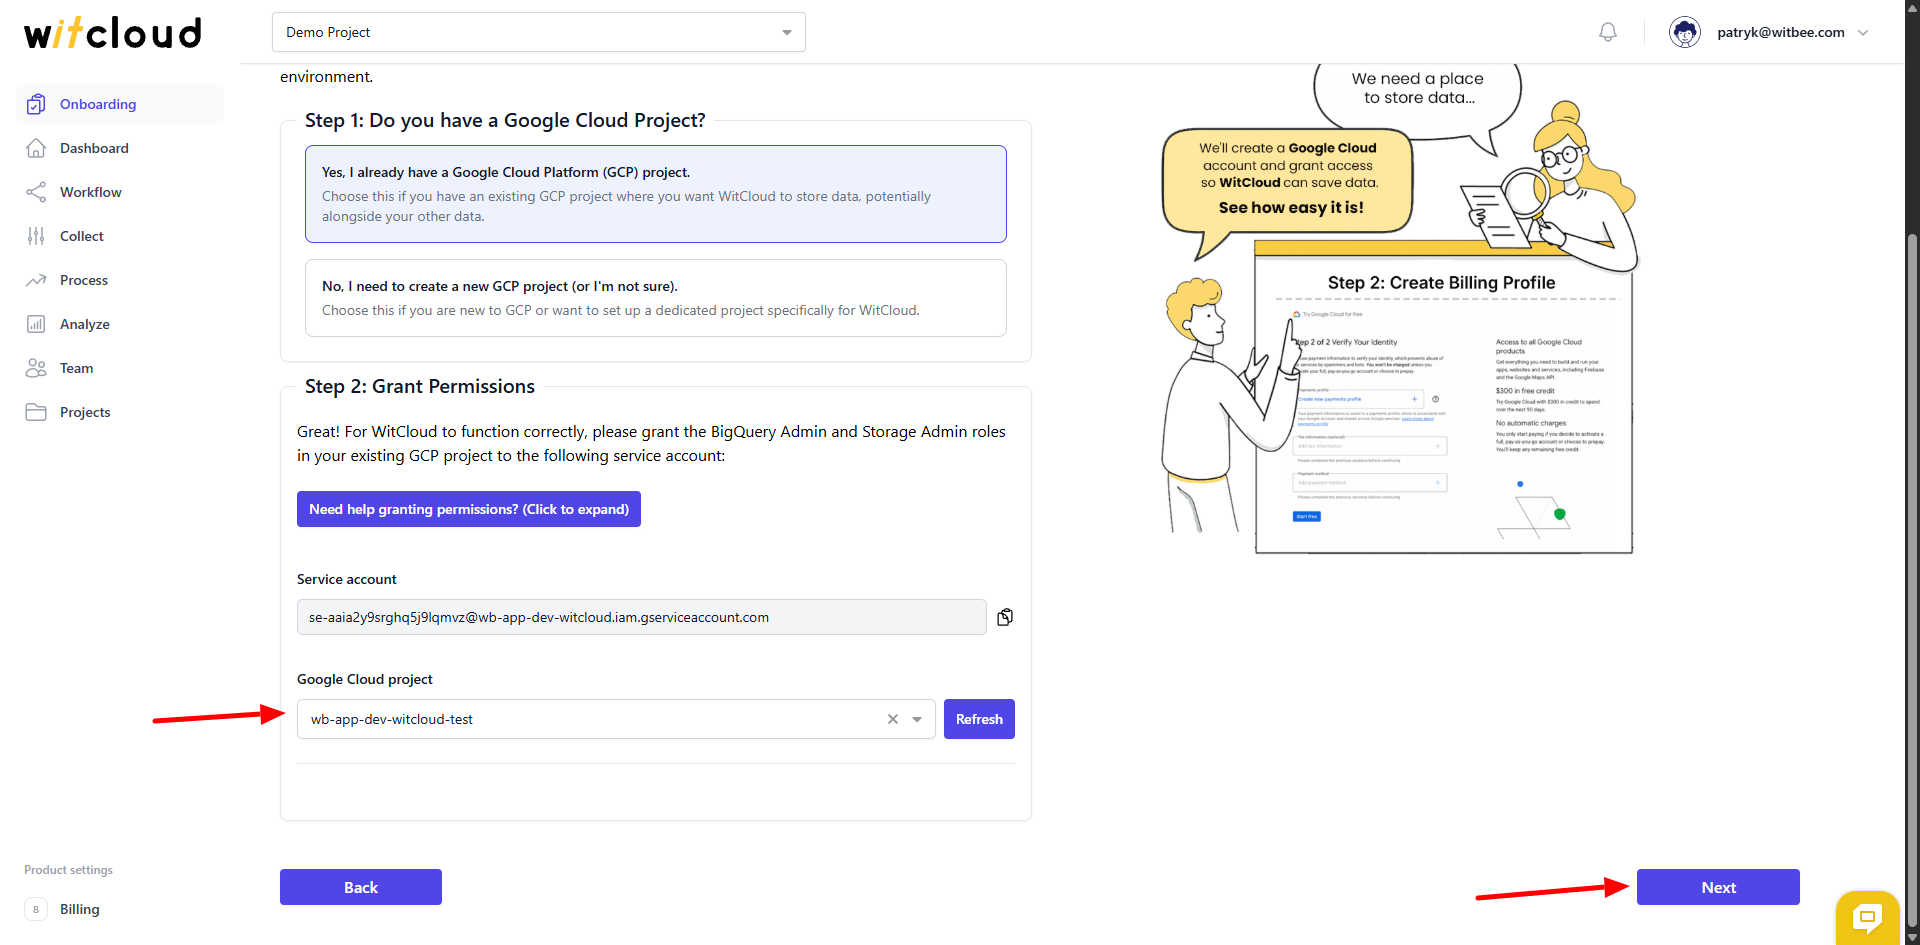
✅ Connect Google Cloud Project
For WitCloud to function properly, it must be granted access to your Google Cloud account.
To start, indicate whether you already have a Google Cloud project. If not, we'll guide you through creating one directly from the panel.
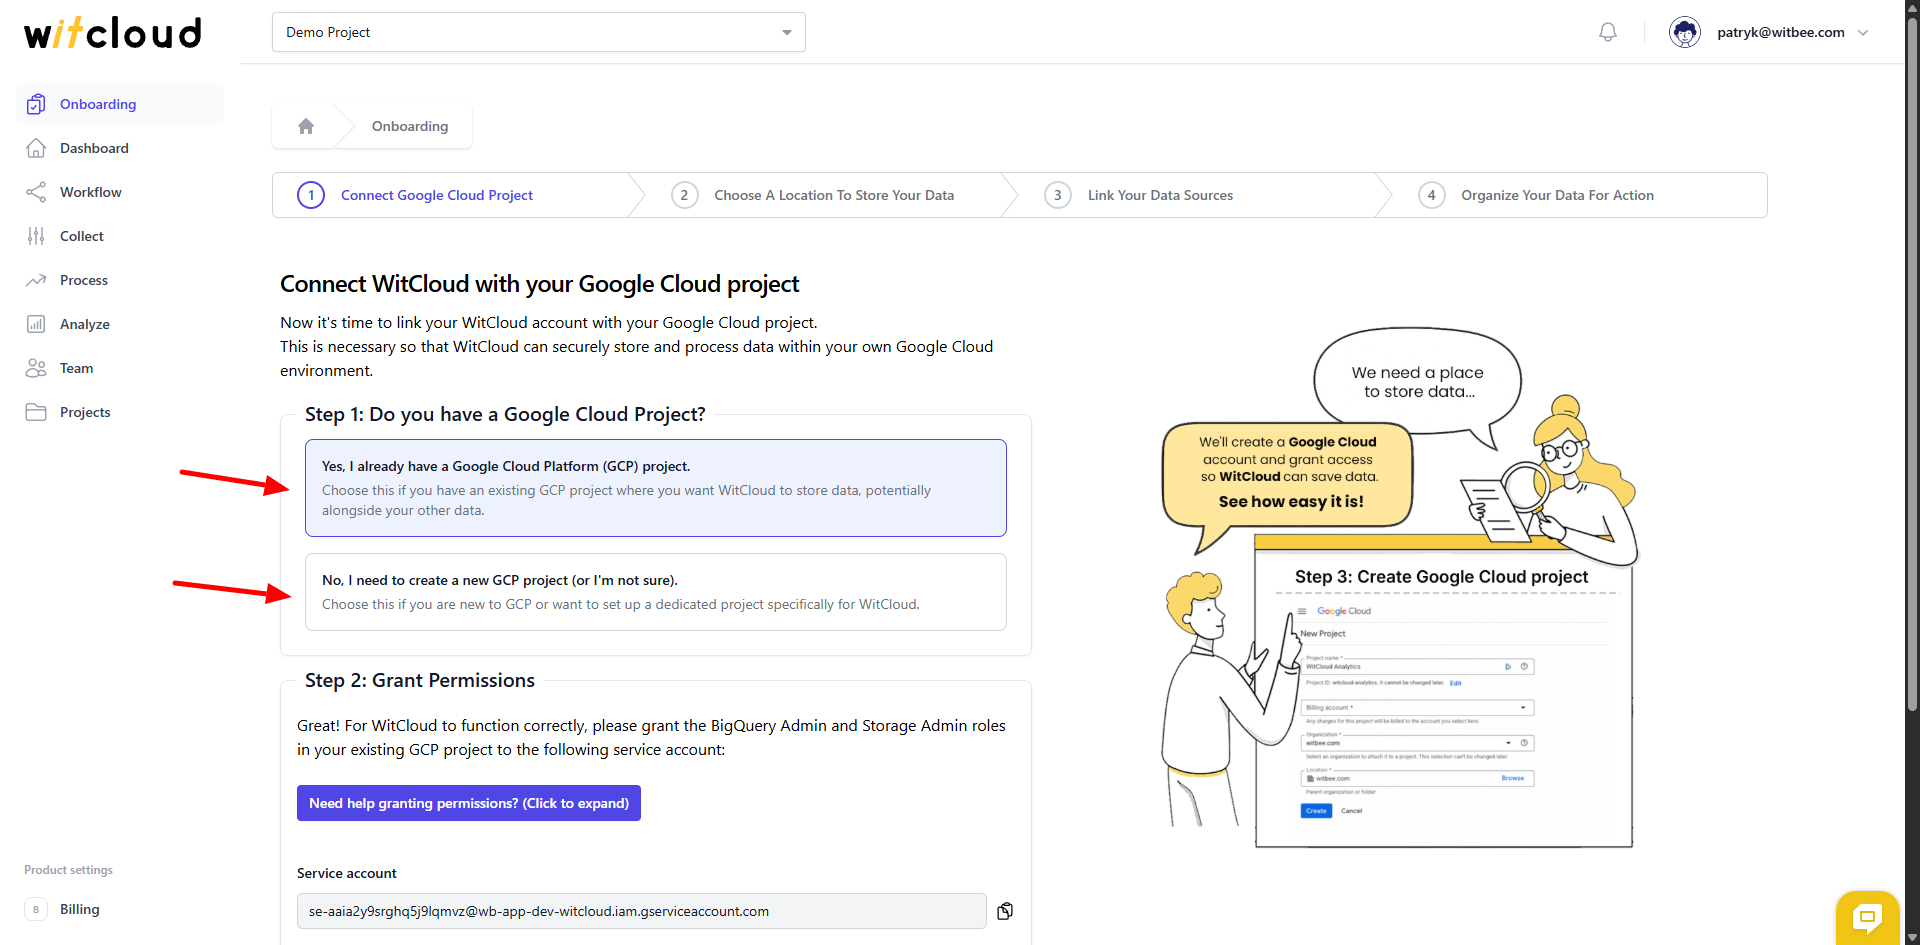
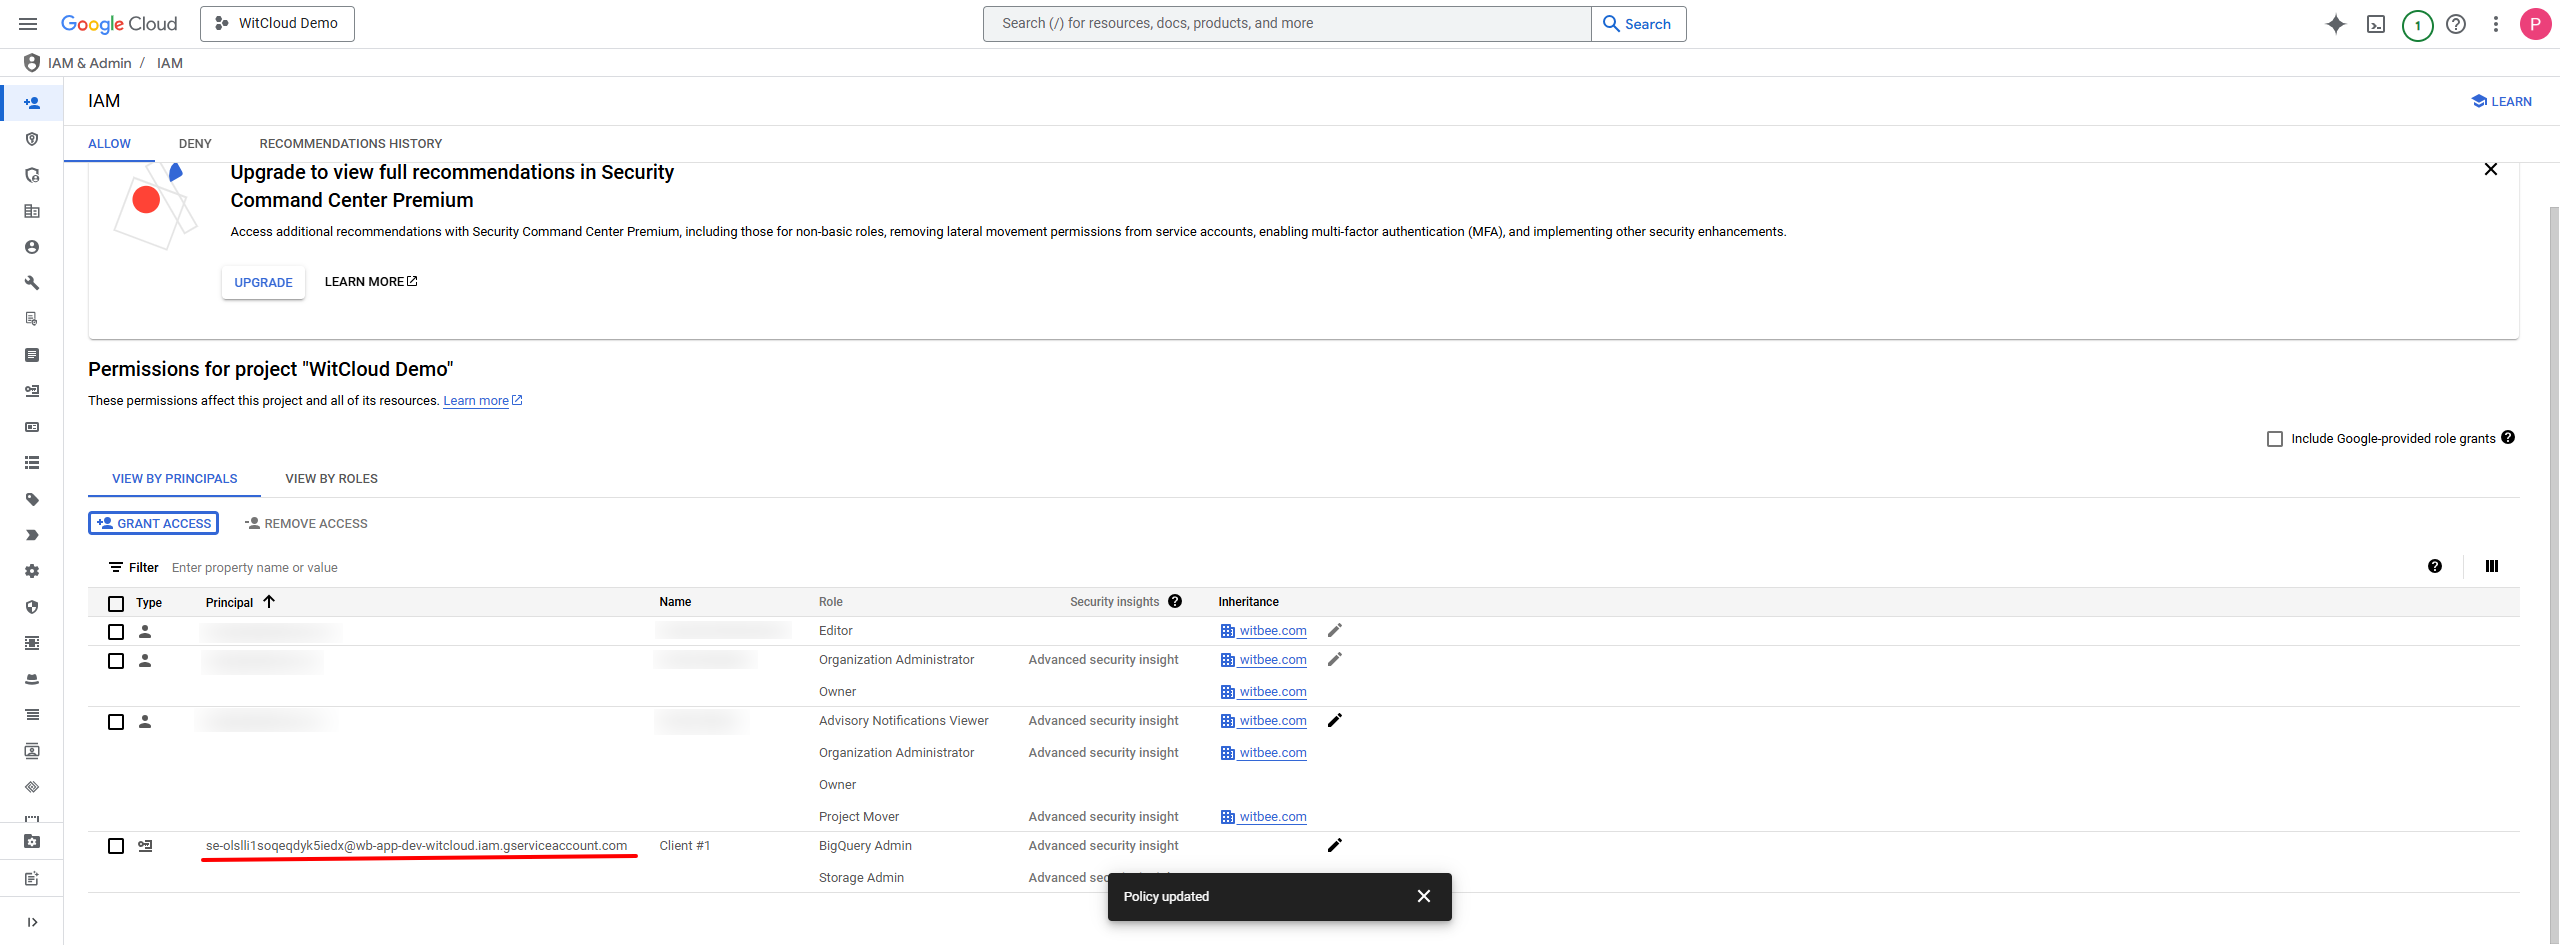
If you already have a Google Cloud project - copy the service account address generated by WitCloud.
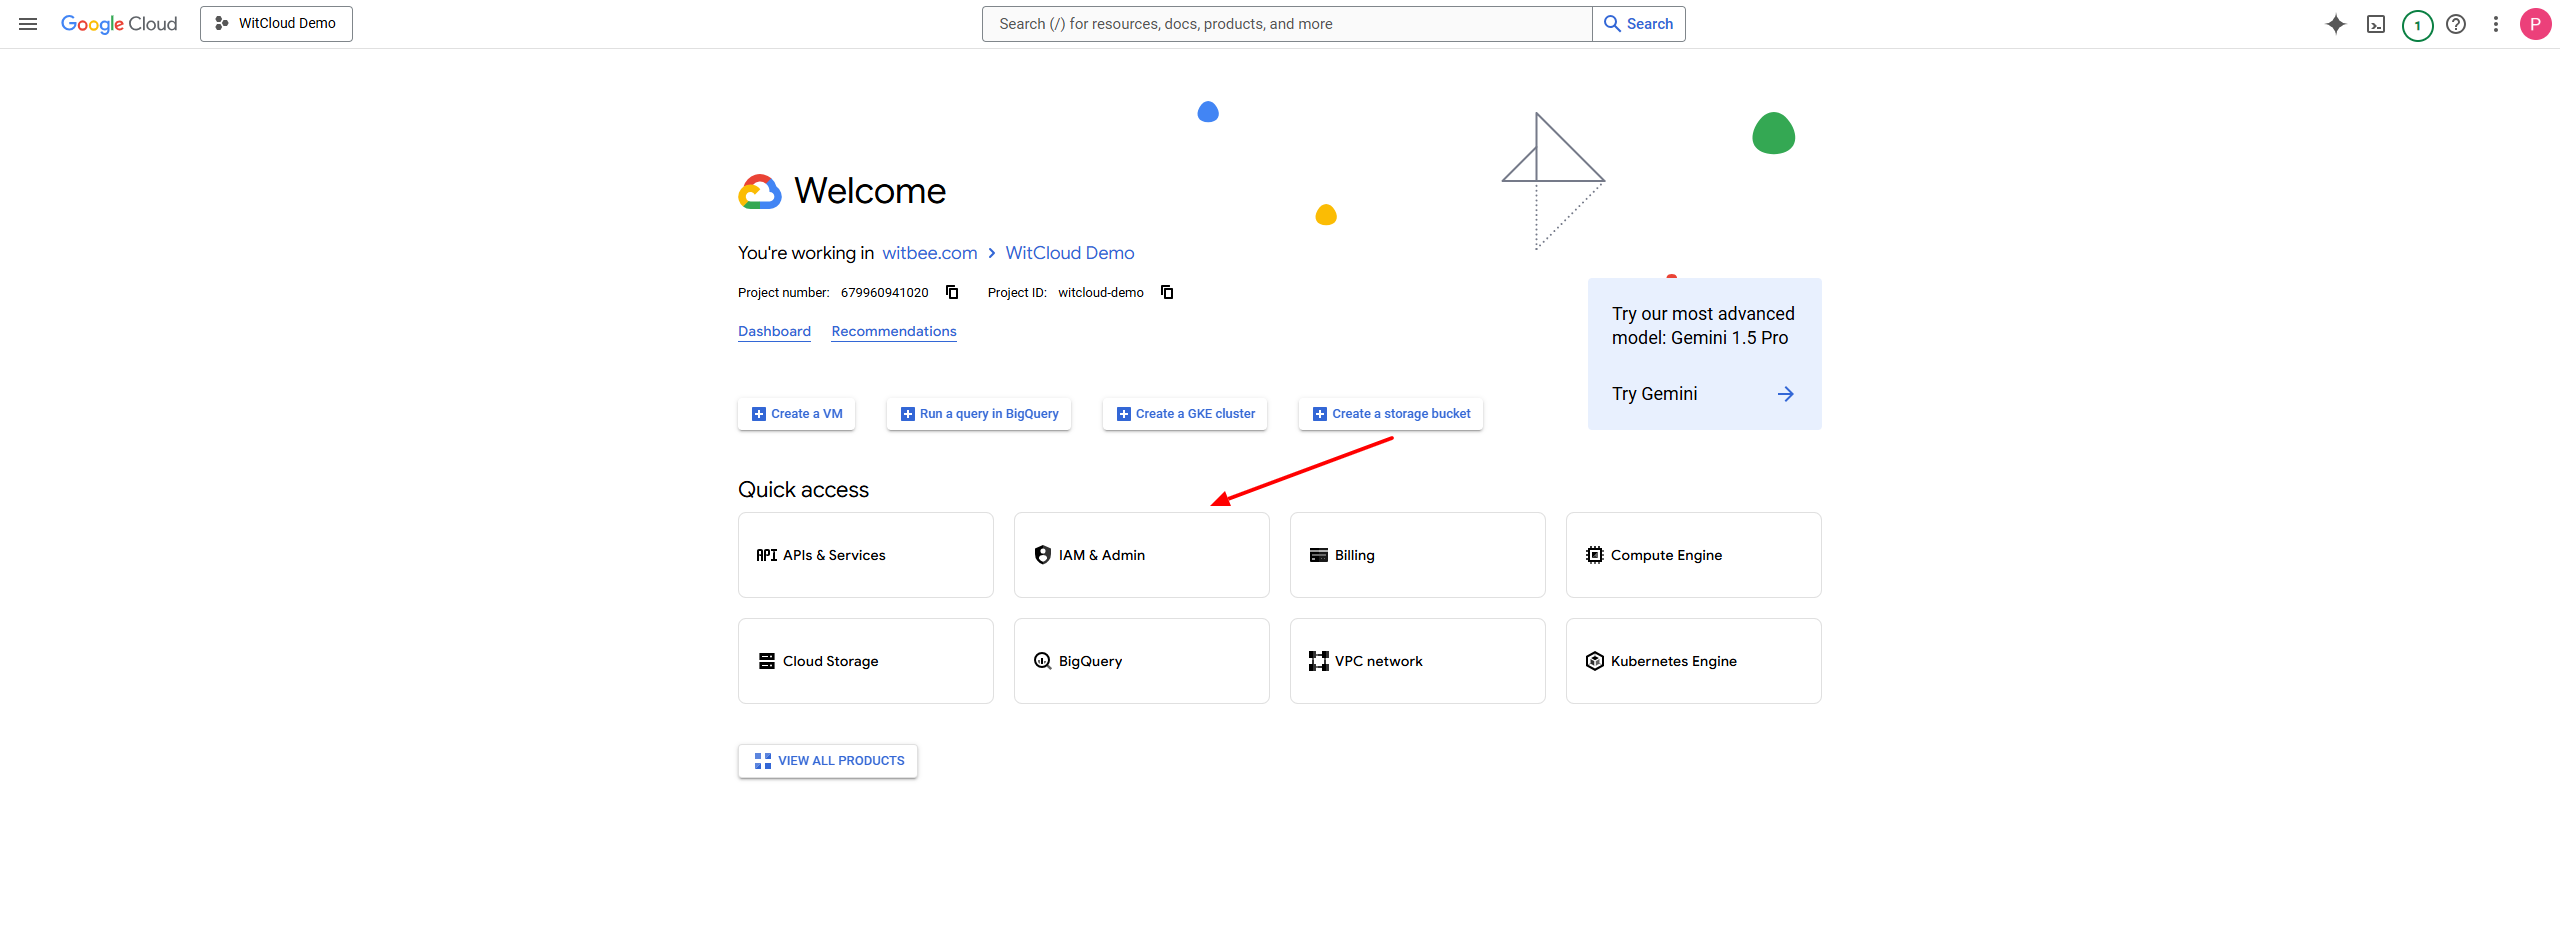
Once logged in, select Administration from the quick access panel.
In the access management section, click Grant Access.
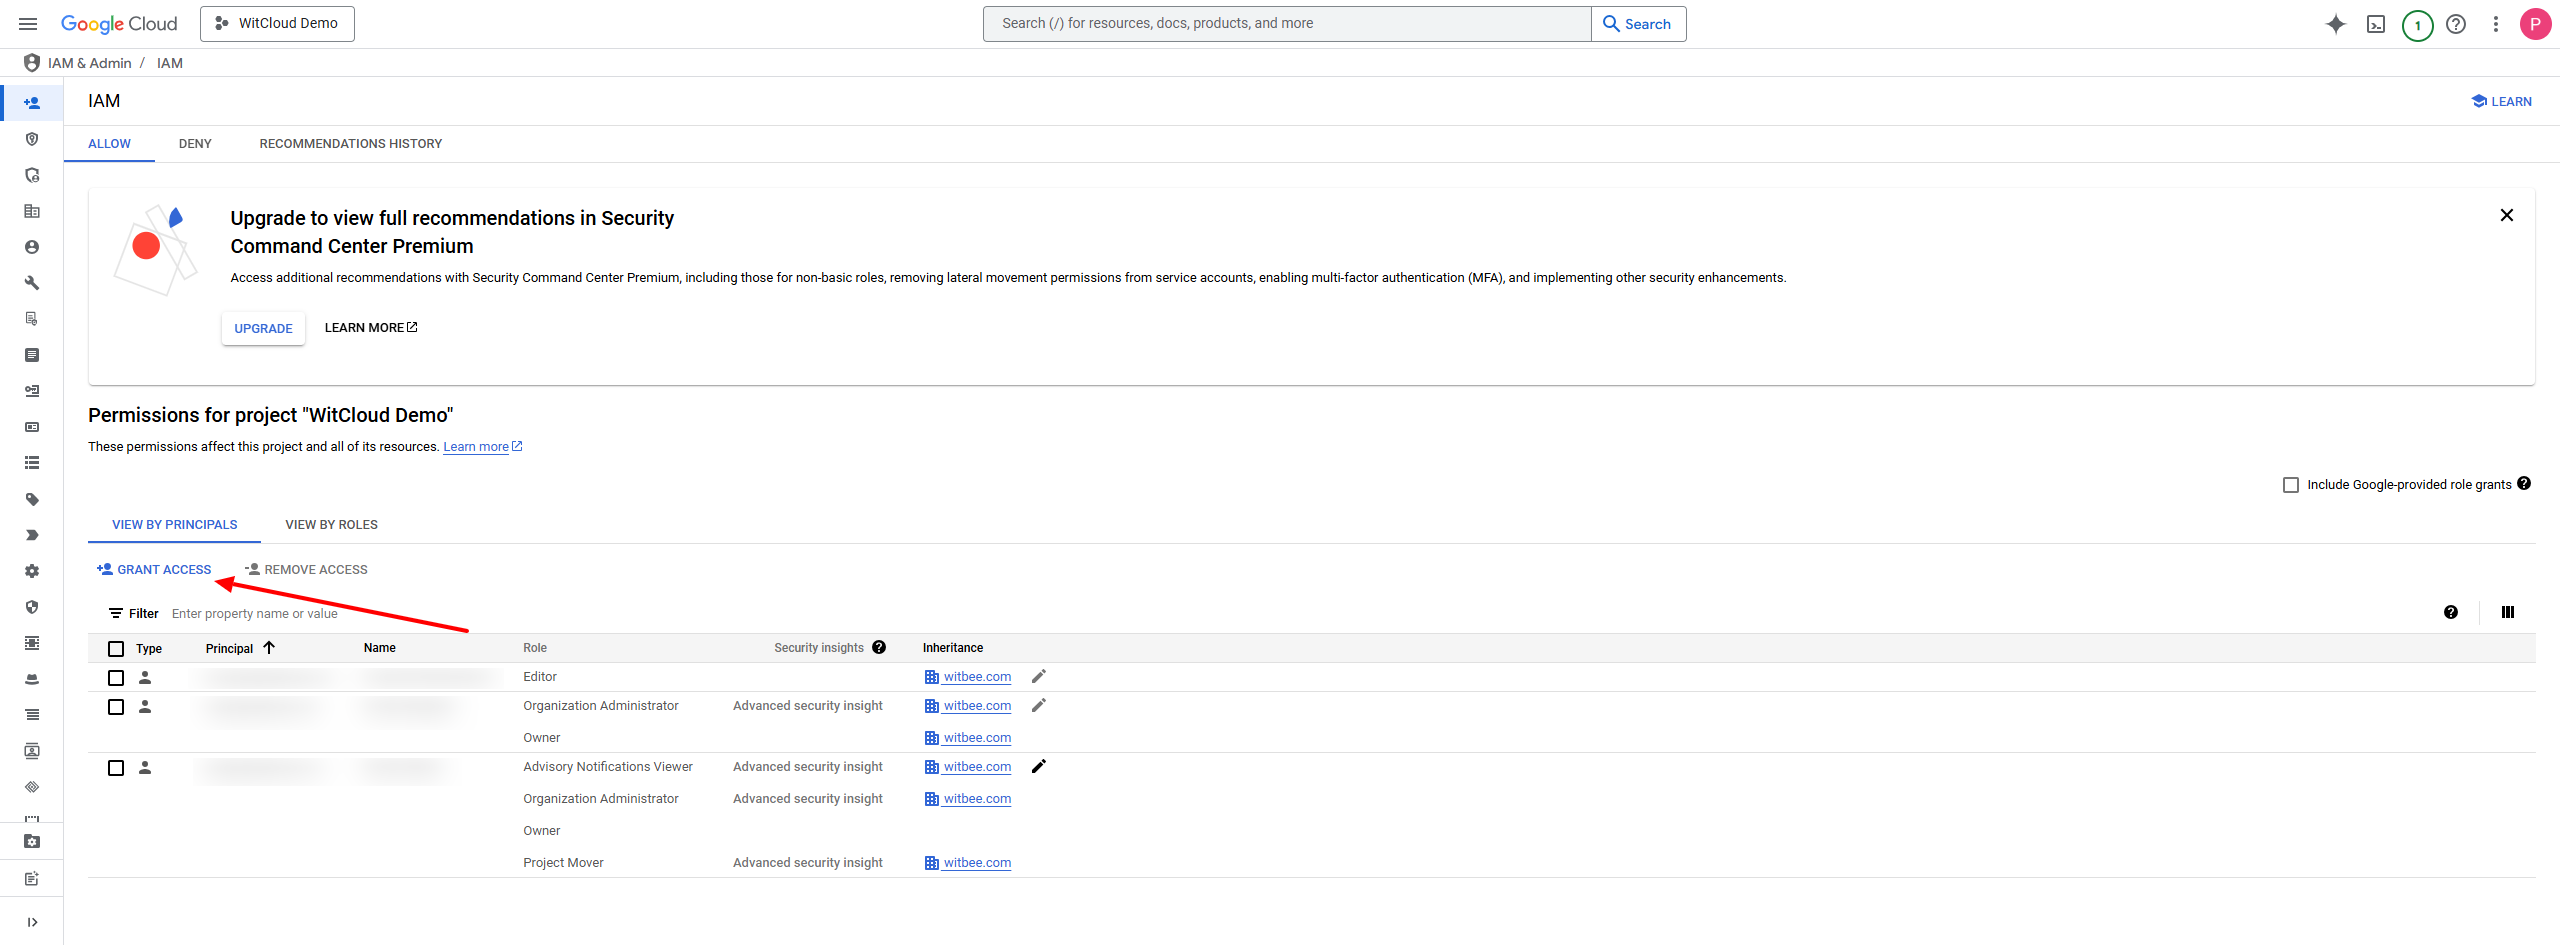
For the user (security entity), enter the service account generated by WitCloud.
Assign the following roles:
- BigQuery Admin
- Storage Admin
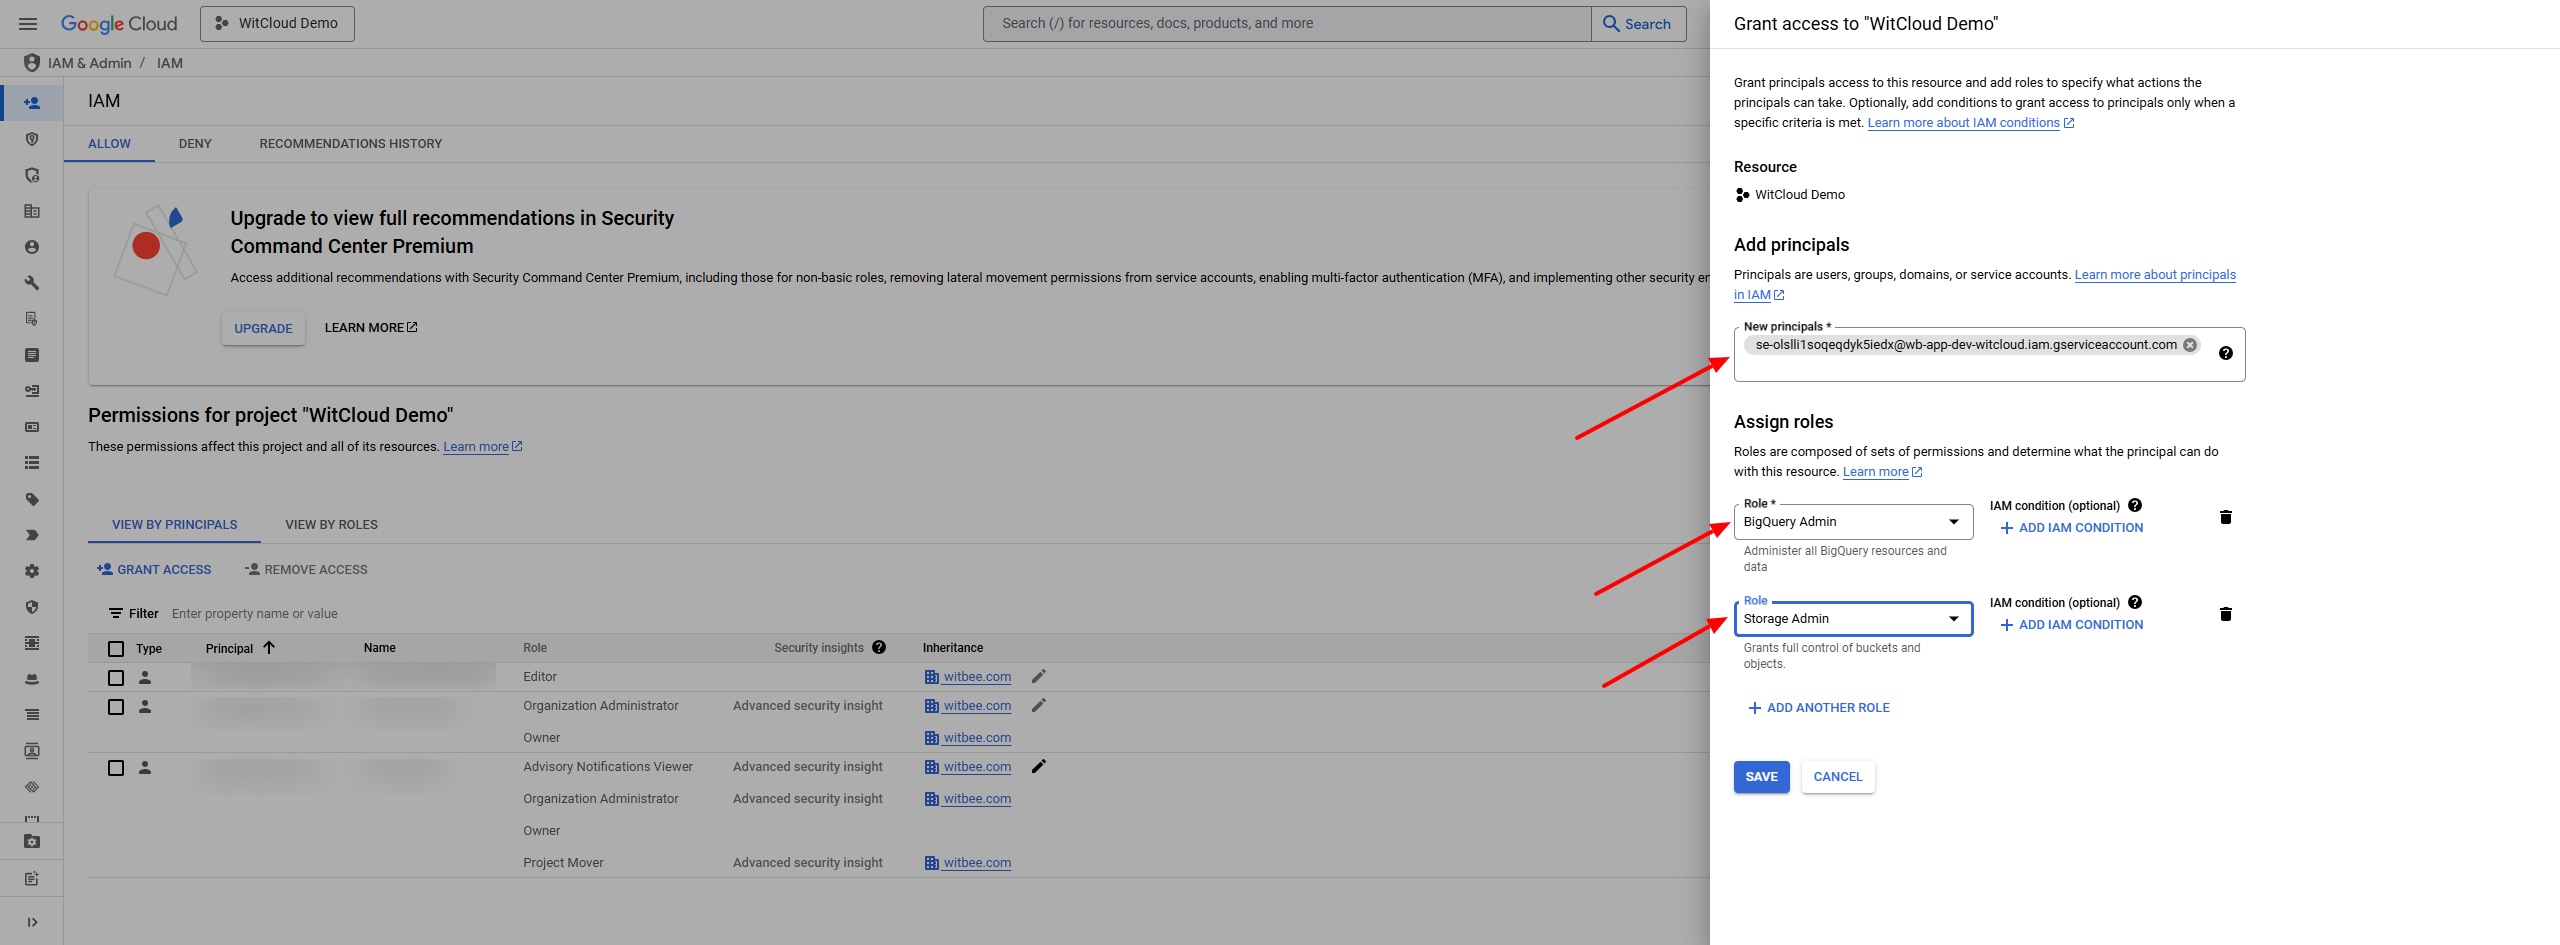
Confirm the changes by clicking Save. The WitCloud service account should now appear in the access list.
Return to the WitCloud panel. In the Google Cloud project selection section, the project you just granted access to should now appear.
💡 Tip: This process can sometimes take a few minutes. If the project does not appear automatically, click Refresh to reload the project list.
Confirm the form by clicking Next.
✅ Choose a location to store your data
First, select whether you already have any data in BigQuery. Depending on your choice, the panel will guide you through the next steps.
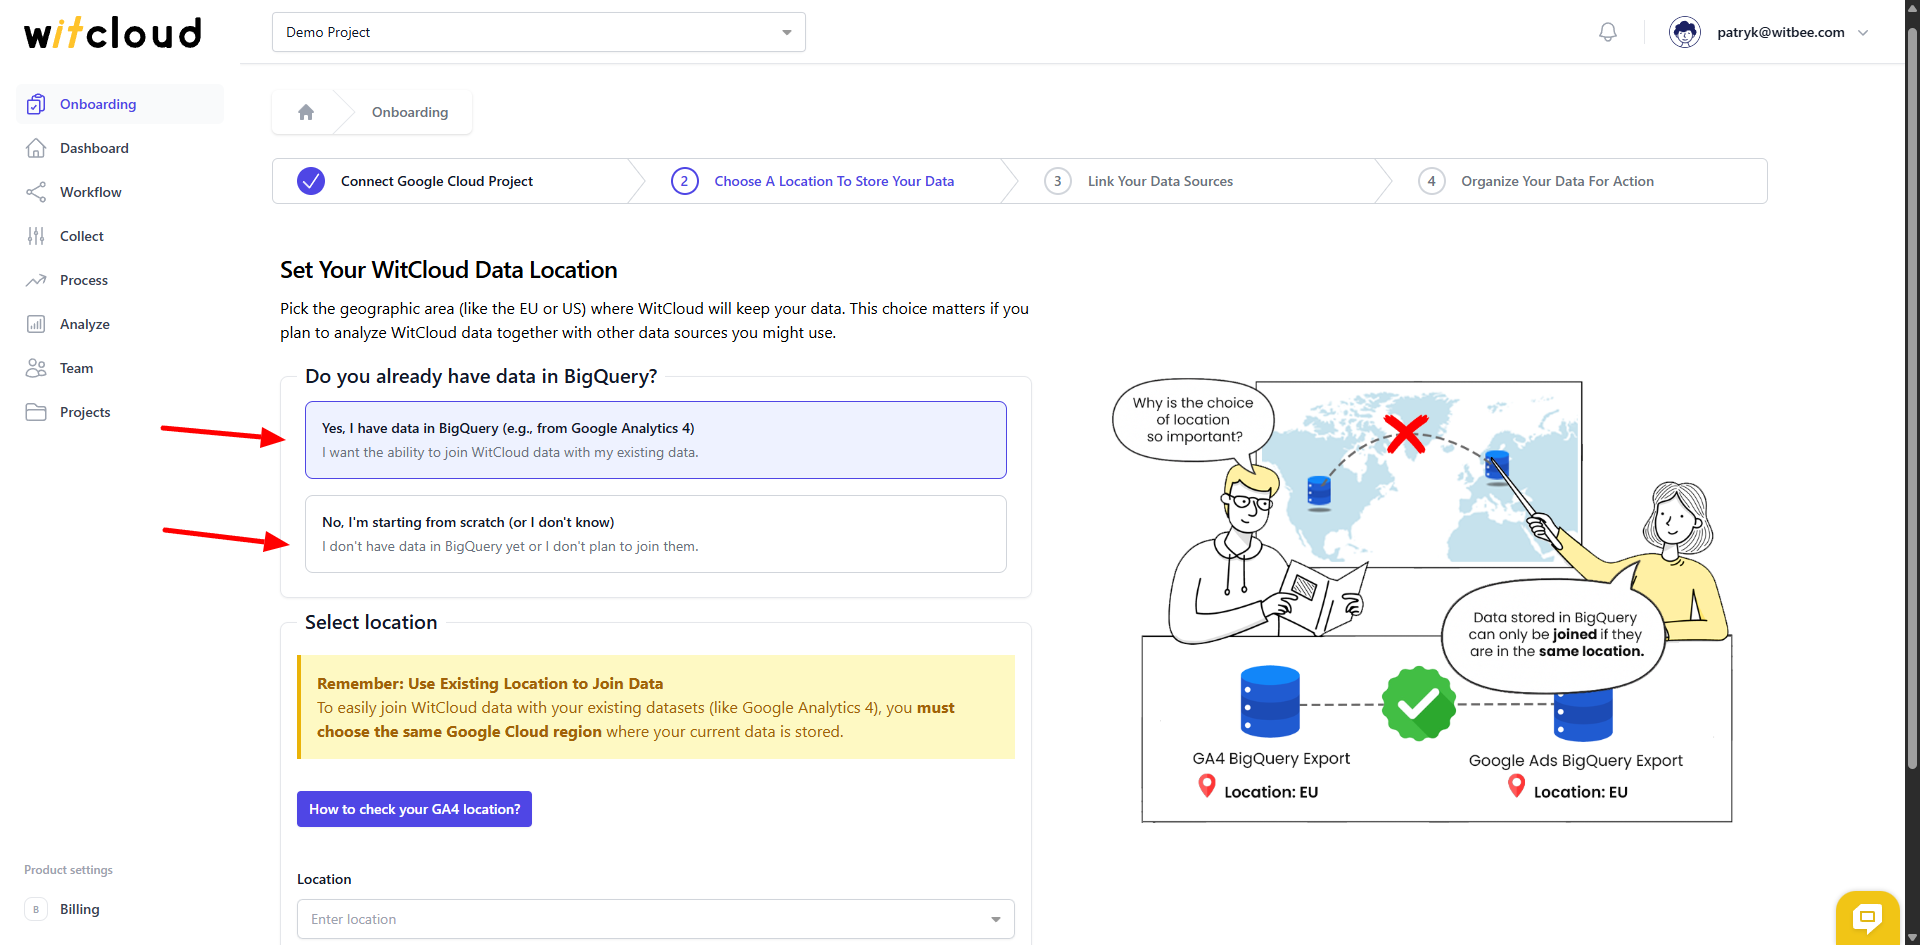
Choose the location where you want WitCloud to store your data.
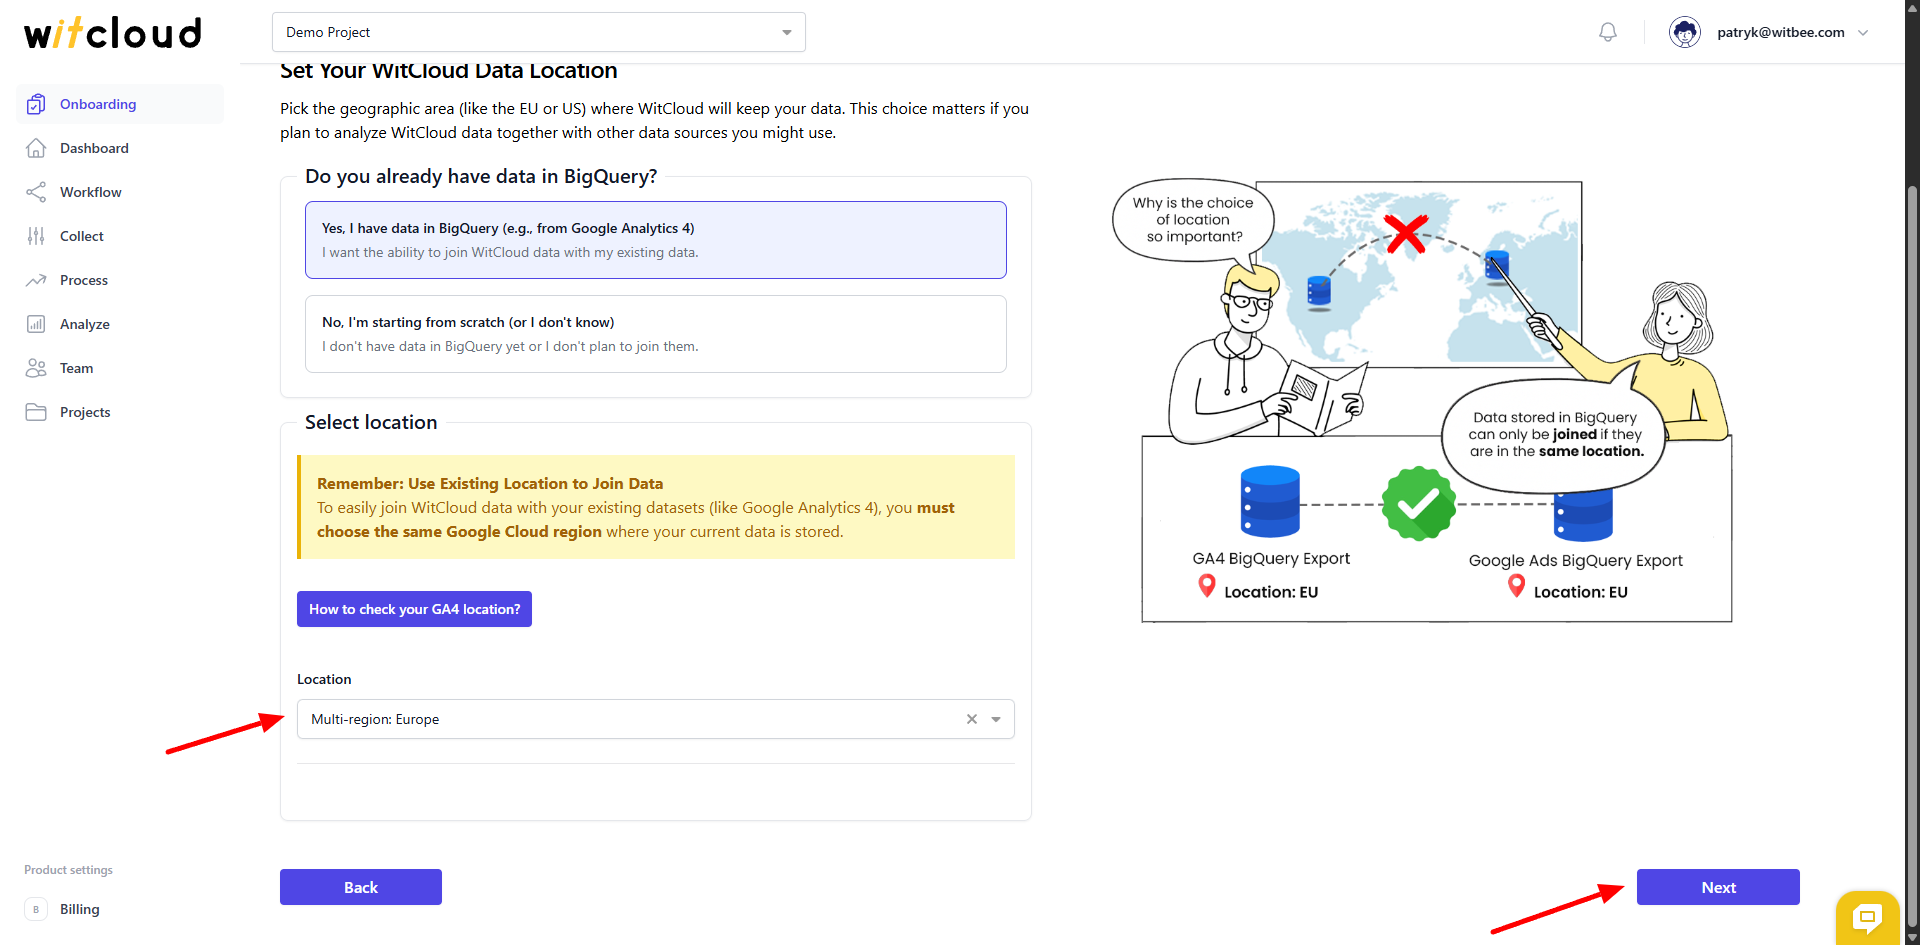
Confirm the form by clicking Next.
💡 Tip: From this point on, the panel is unlocked and you can navigate it freely. The next onboarding steps are designed to make your initial setup easier.
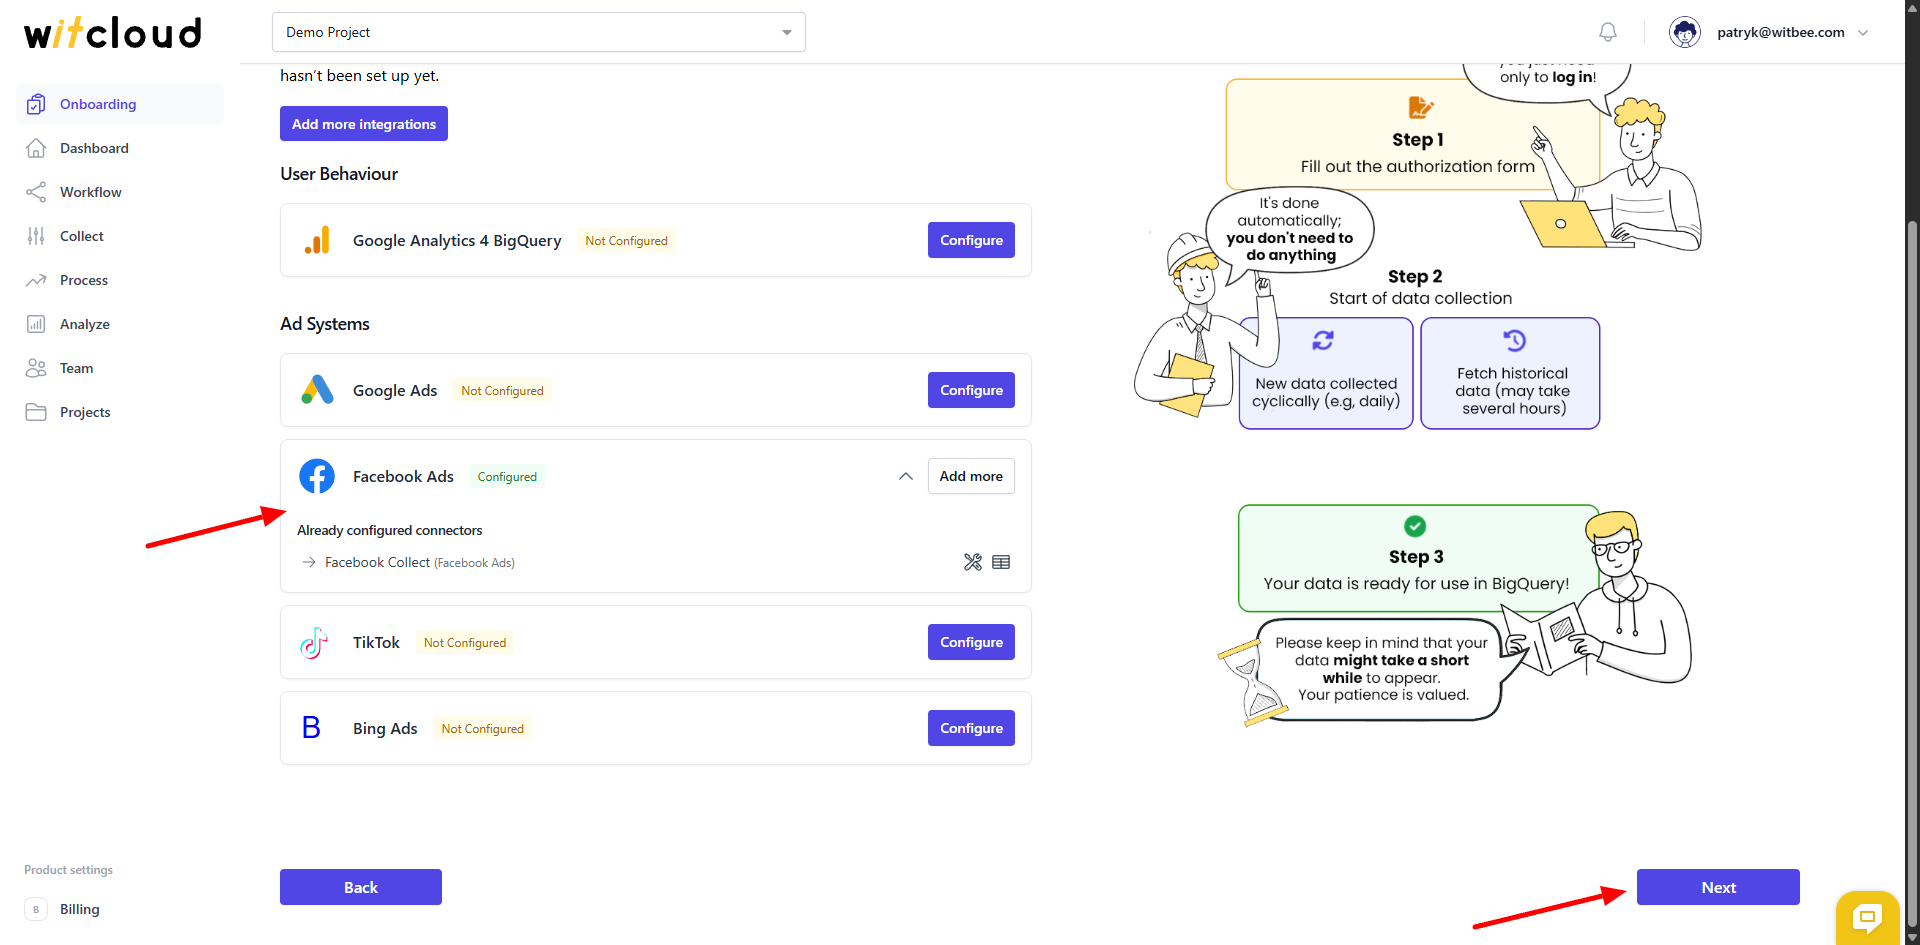
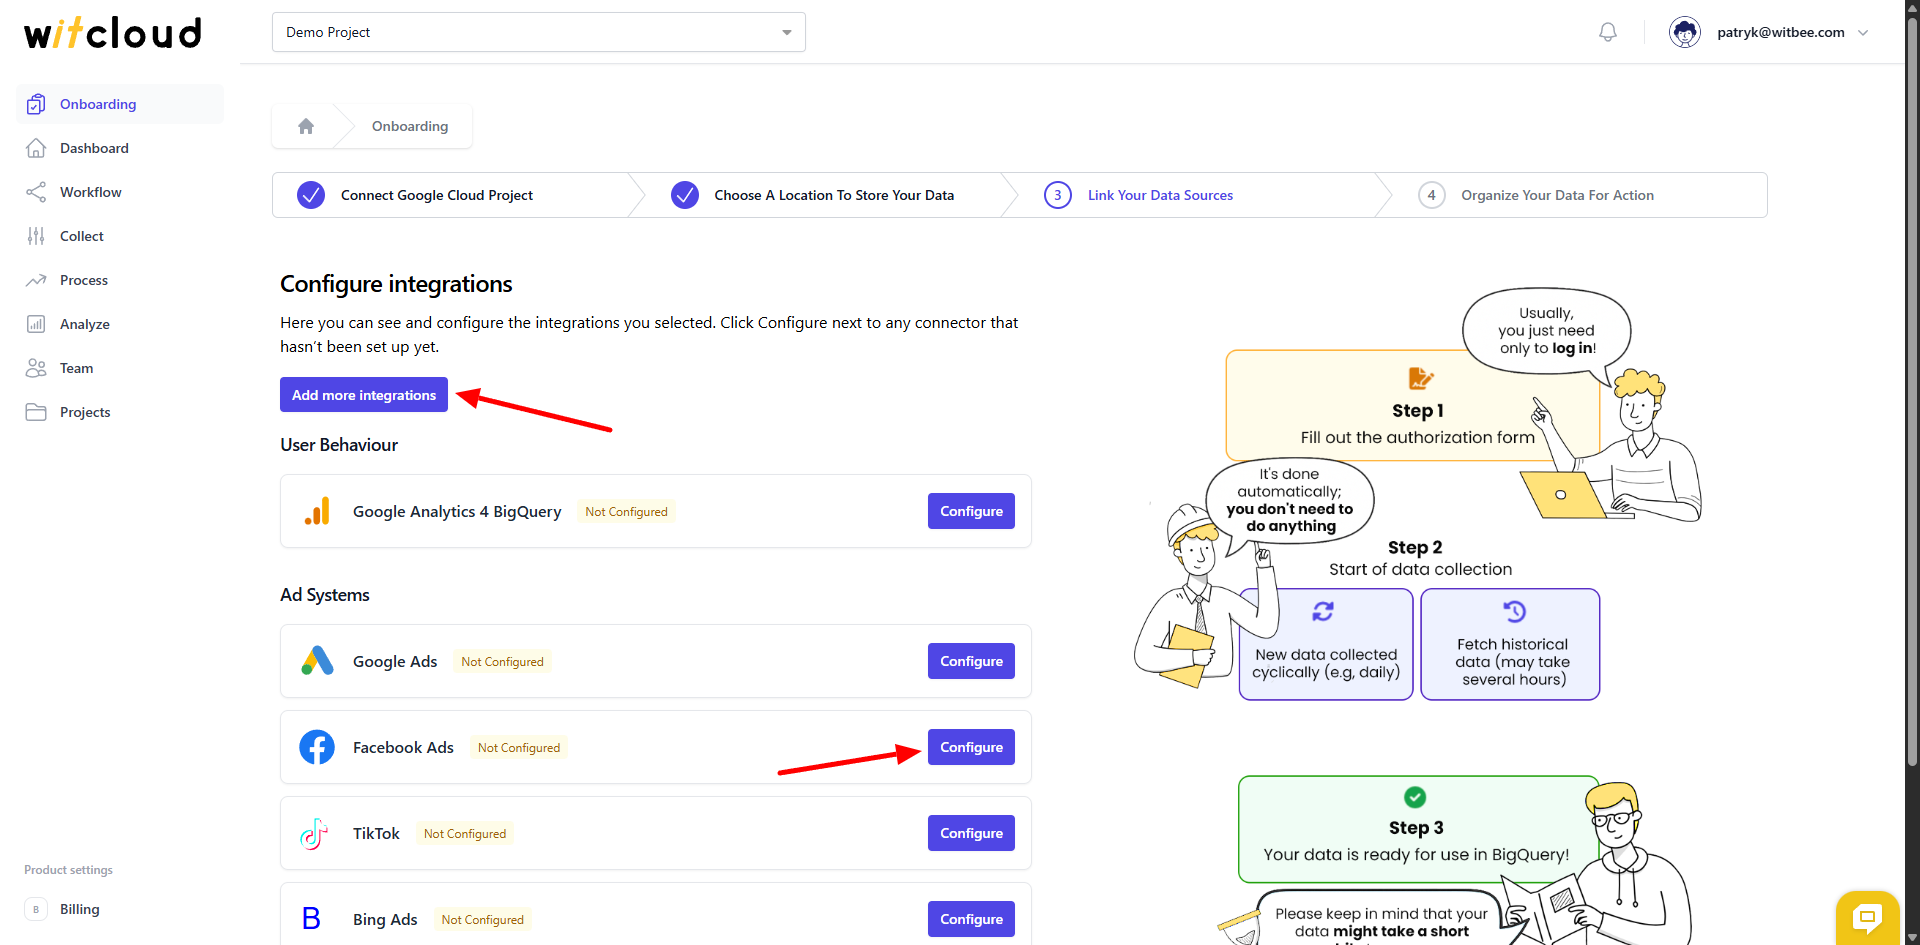
✅ Configure data sources
In this step, we show the list of integrations you previously selected.
- If you forgot something, you can use the Add more integrations button to add additional integrations.
- Use the Configure button to proceed with setting up the connector, after which the data will start appearing in BigQuery.
After successfully configuring the connectors, you can proceed to the next step.