Access Management
In this section, you will learn how to grant and manage project access for your team members on the WitCloud platform.
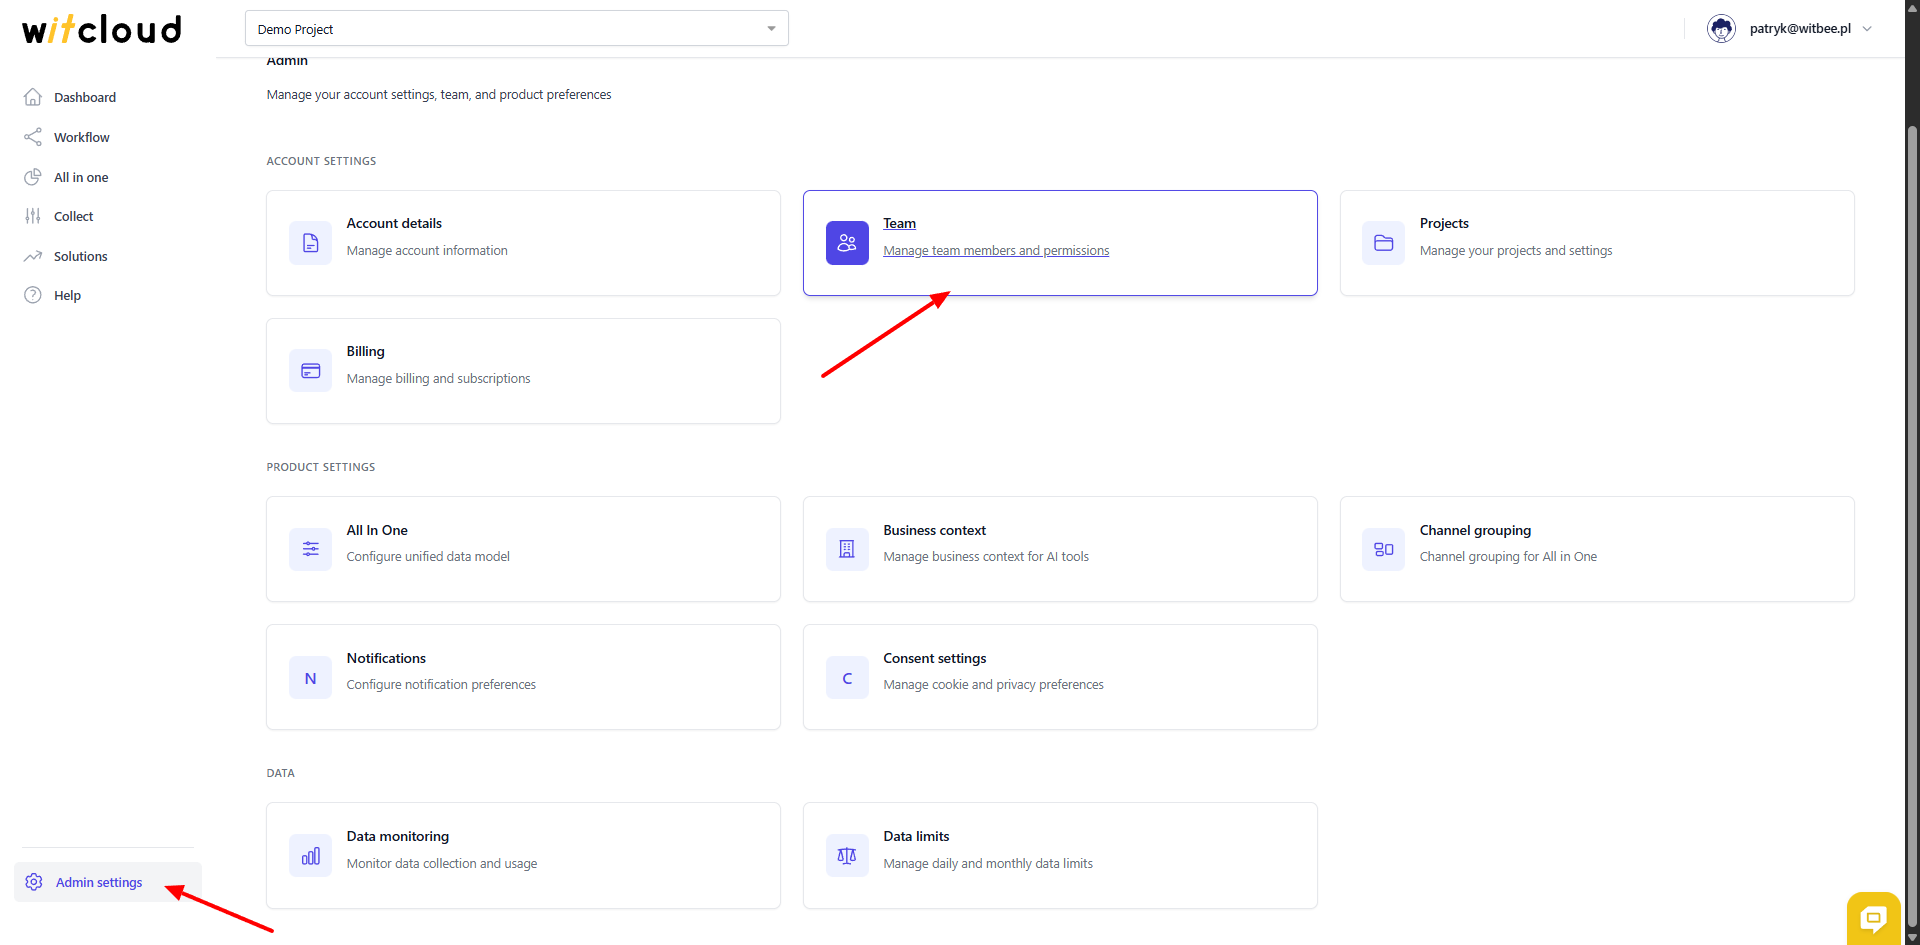
👨💻 Log in to Your Account
After logging into the platform, navigate to the Admin settings > Team section by clicking the appropriate option in the left-hand menu.
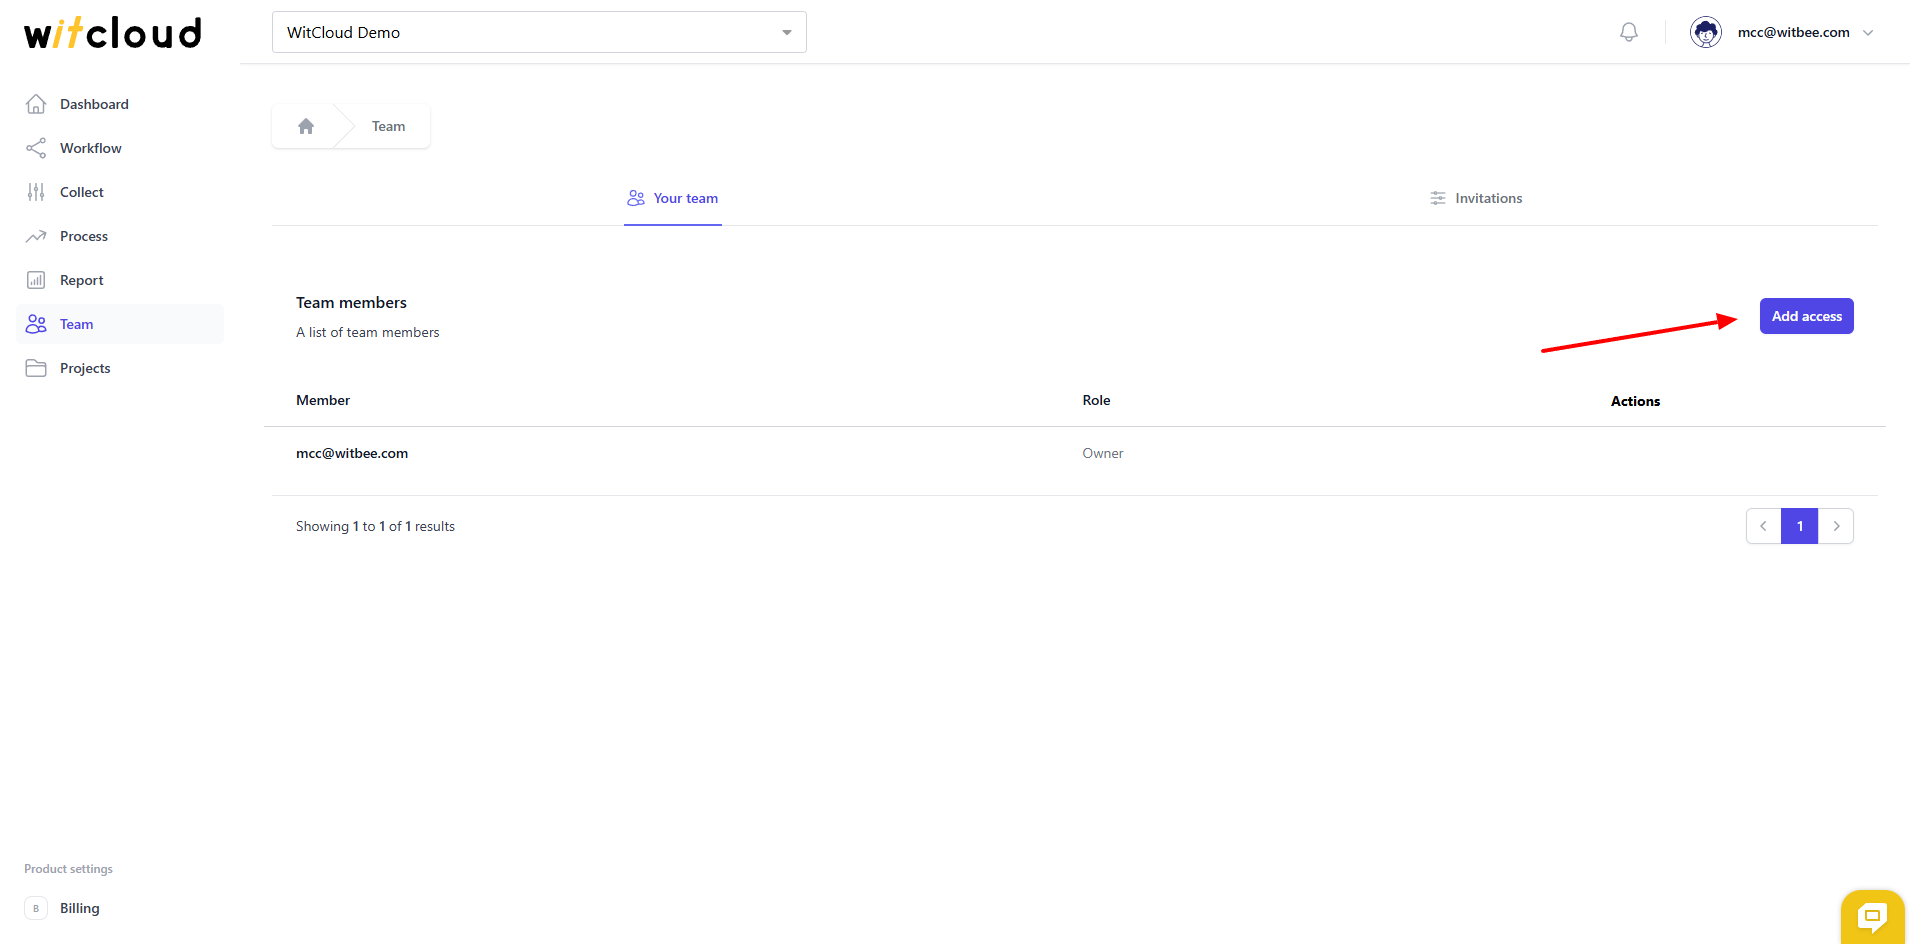
➕ How to Grant Access to an Existing User
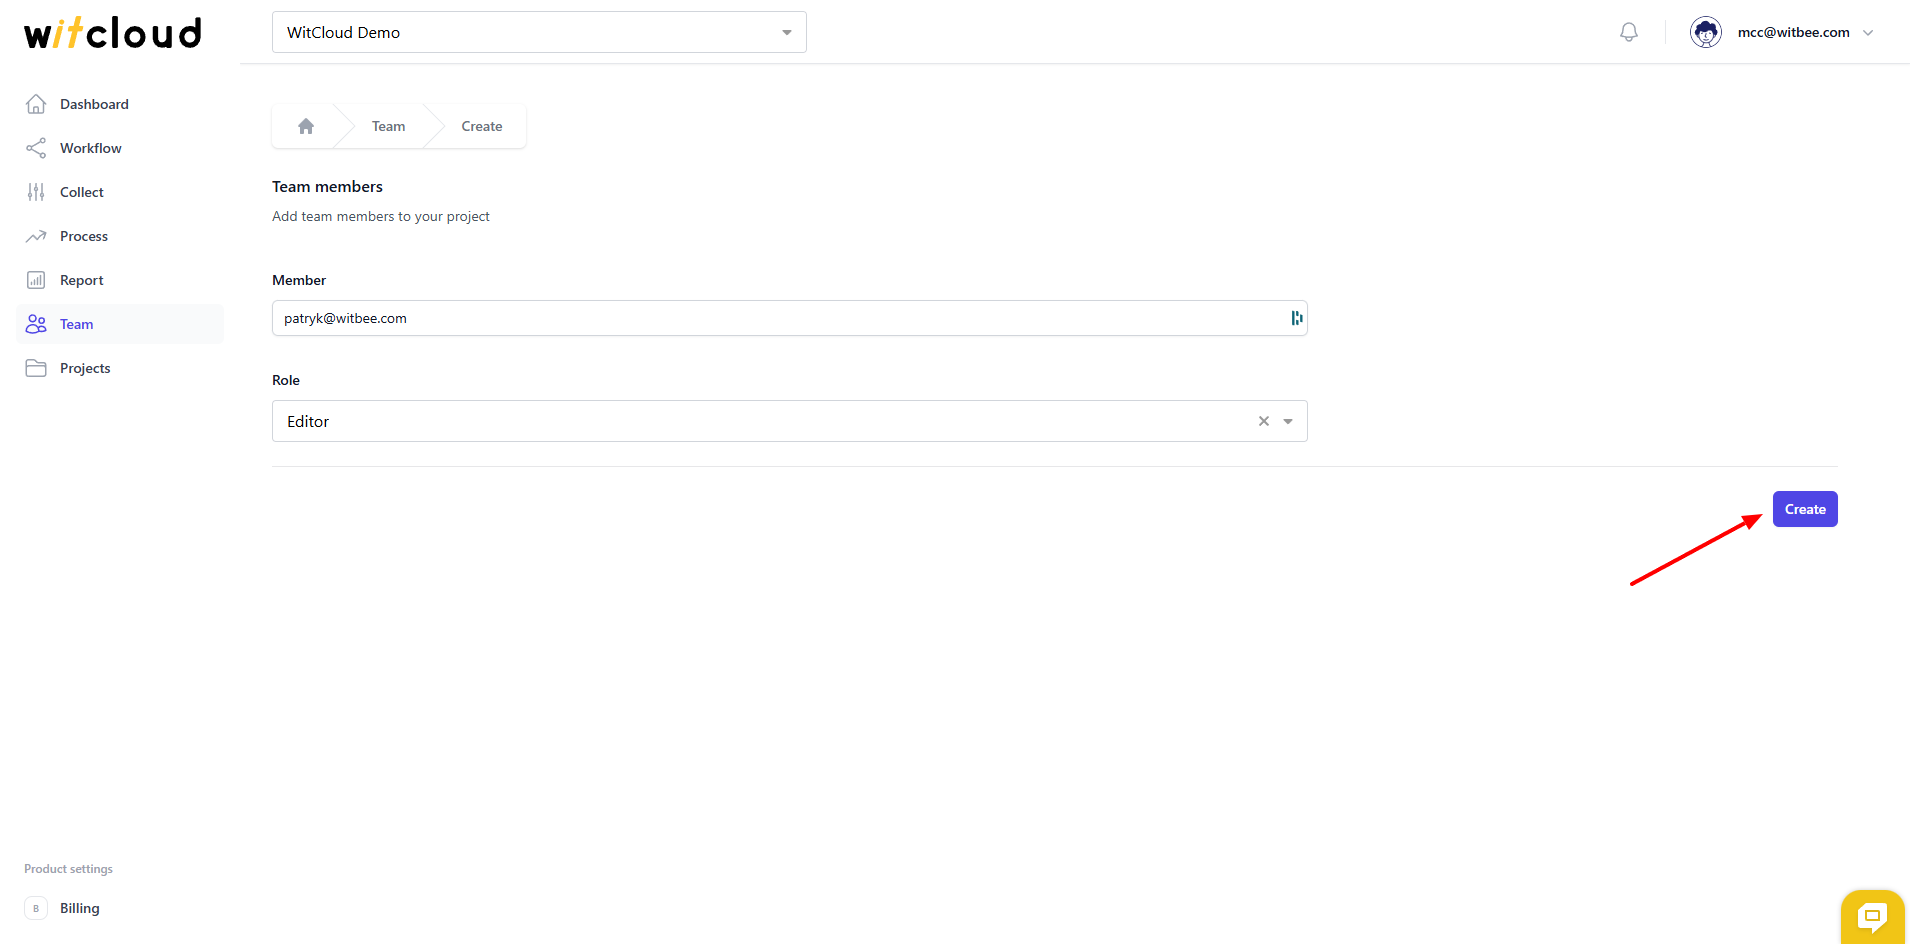
Click the Add access button.
Enter the user's email address and select the appropriate role.
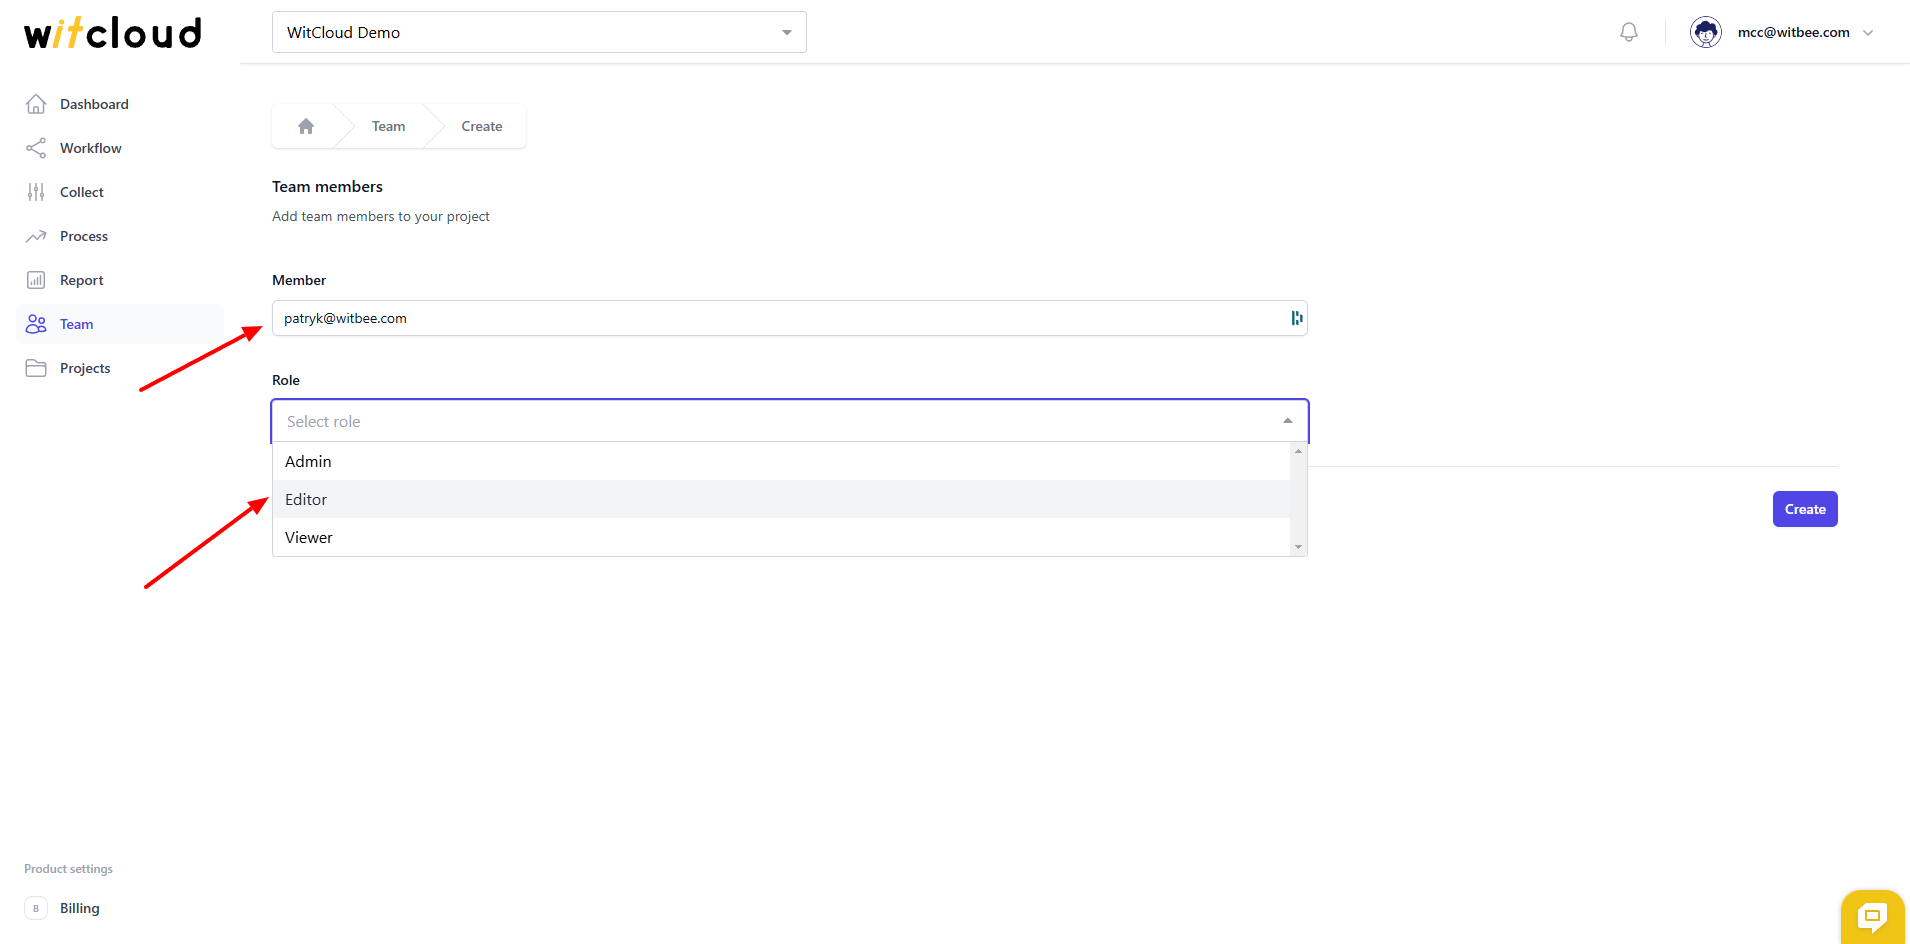
Confirm by clicking Create.
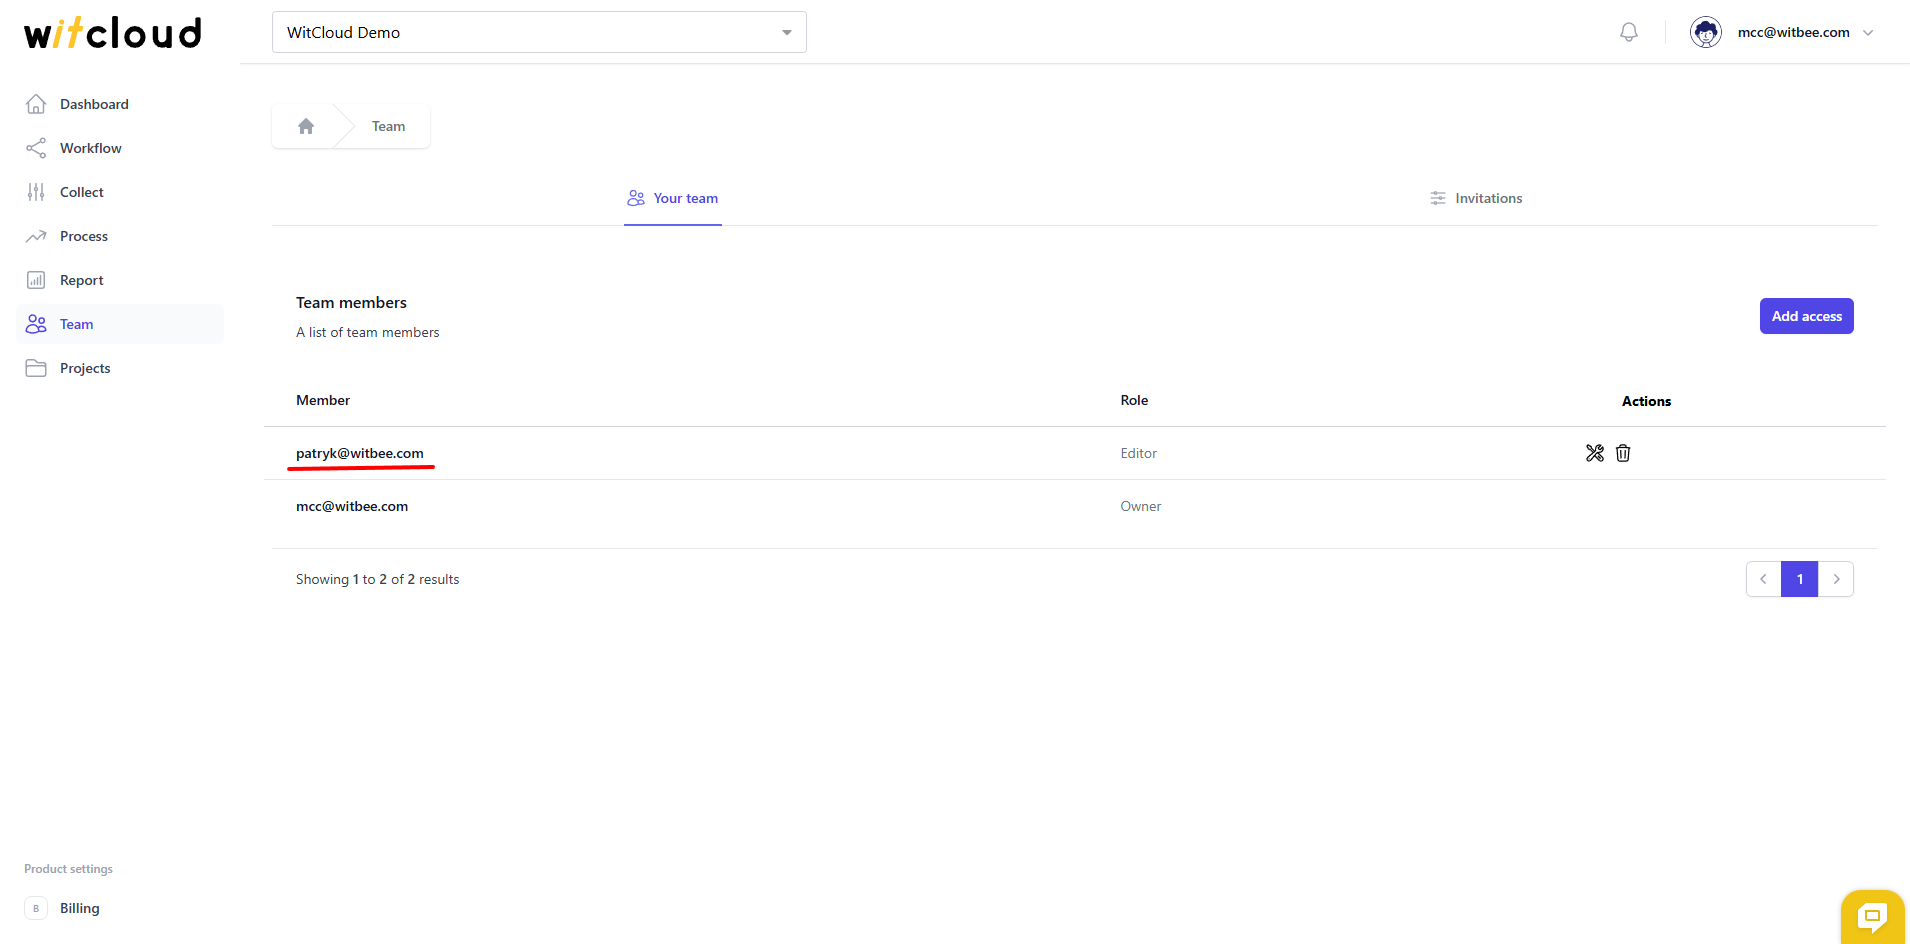
Done! The user has now been granted access to your project.
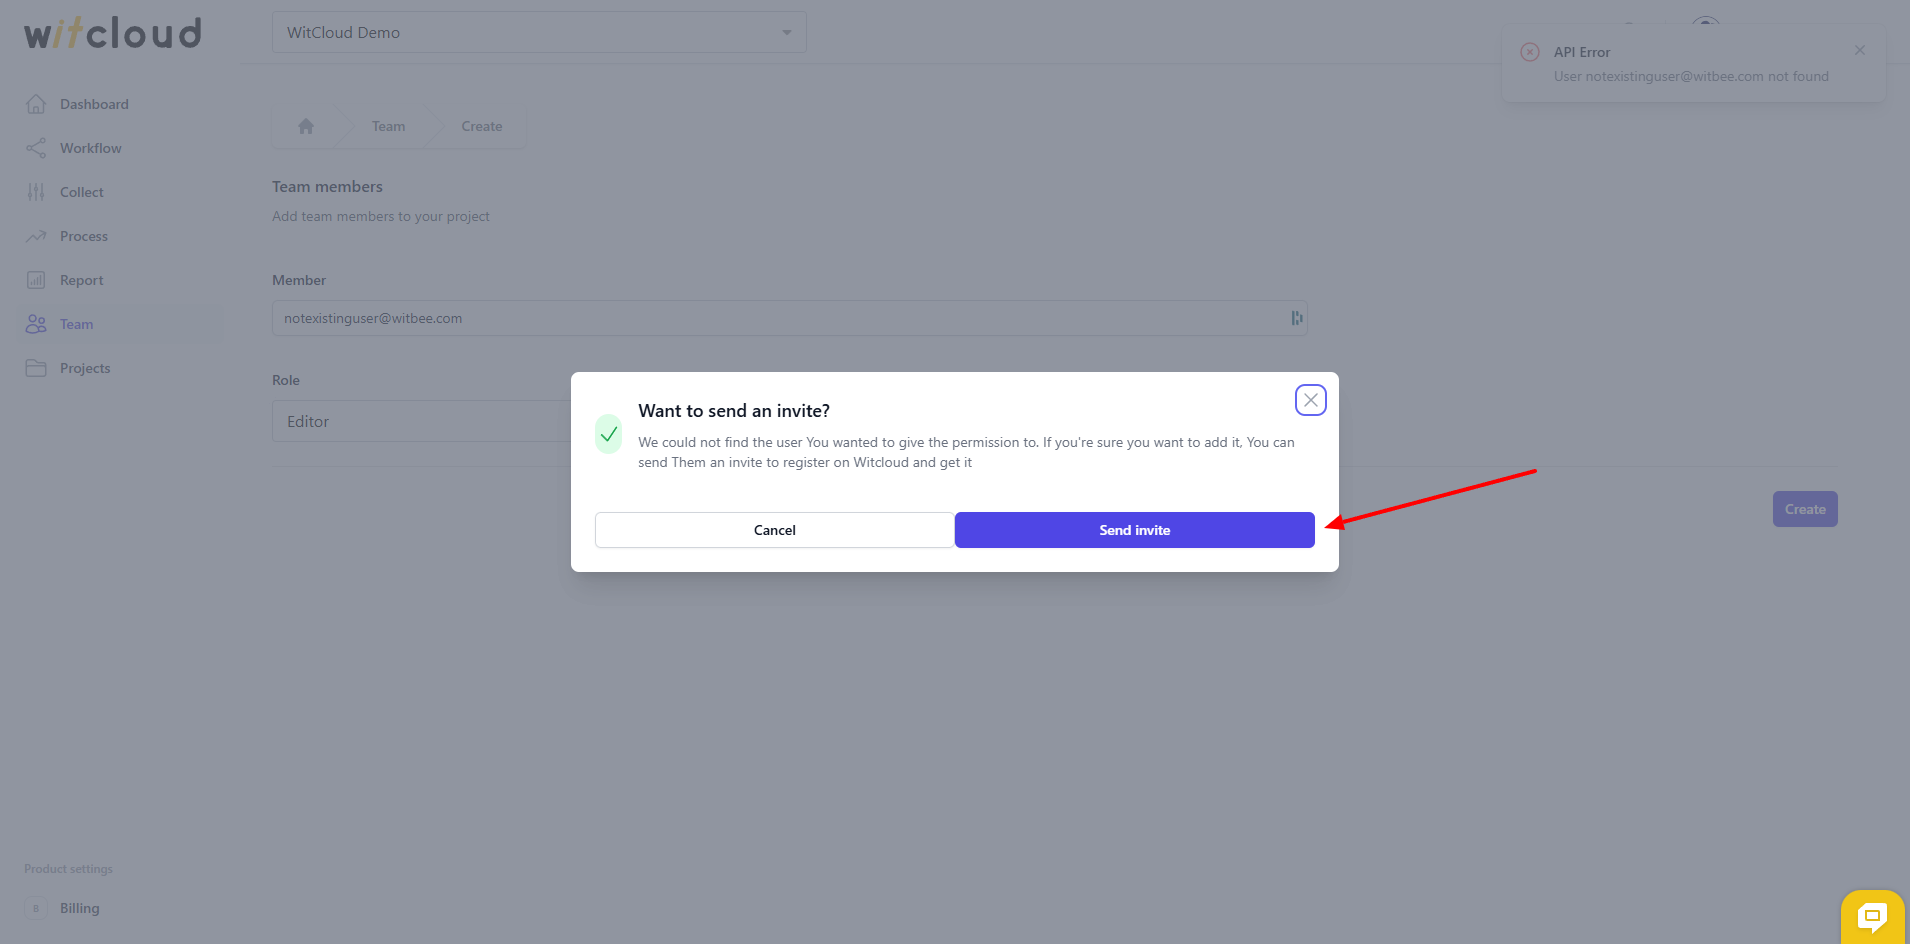
🆕 How to Grant Access to a New User
If you want to grant access to someone who does not yet have a WitCloud account, you can send them an invitation:
Fill out the form with the user's email address and assign a role.

Click Create. A confirmation window will appear.
Confirm by clicking Send invite.
The user will receive an invitation to the provided email address. Once they create an account, they will automatically gain access to your WitCloud project.
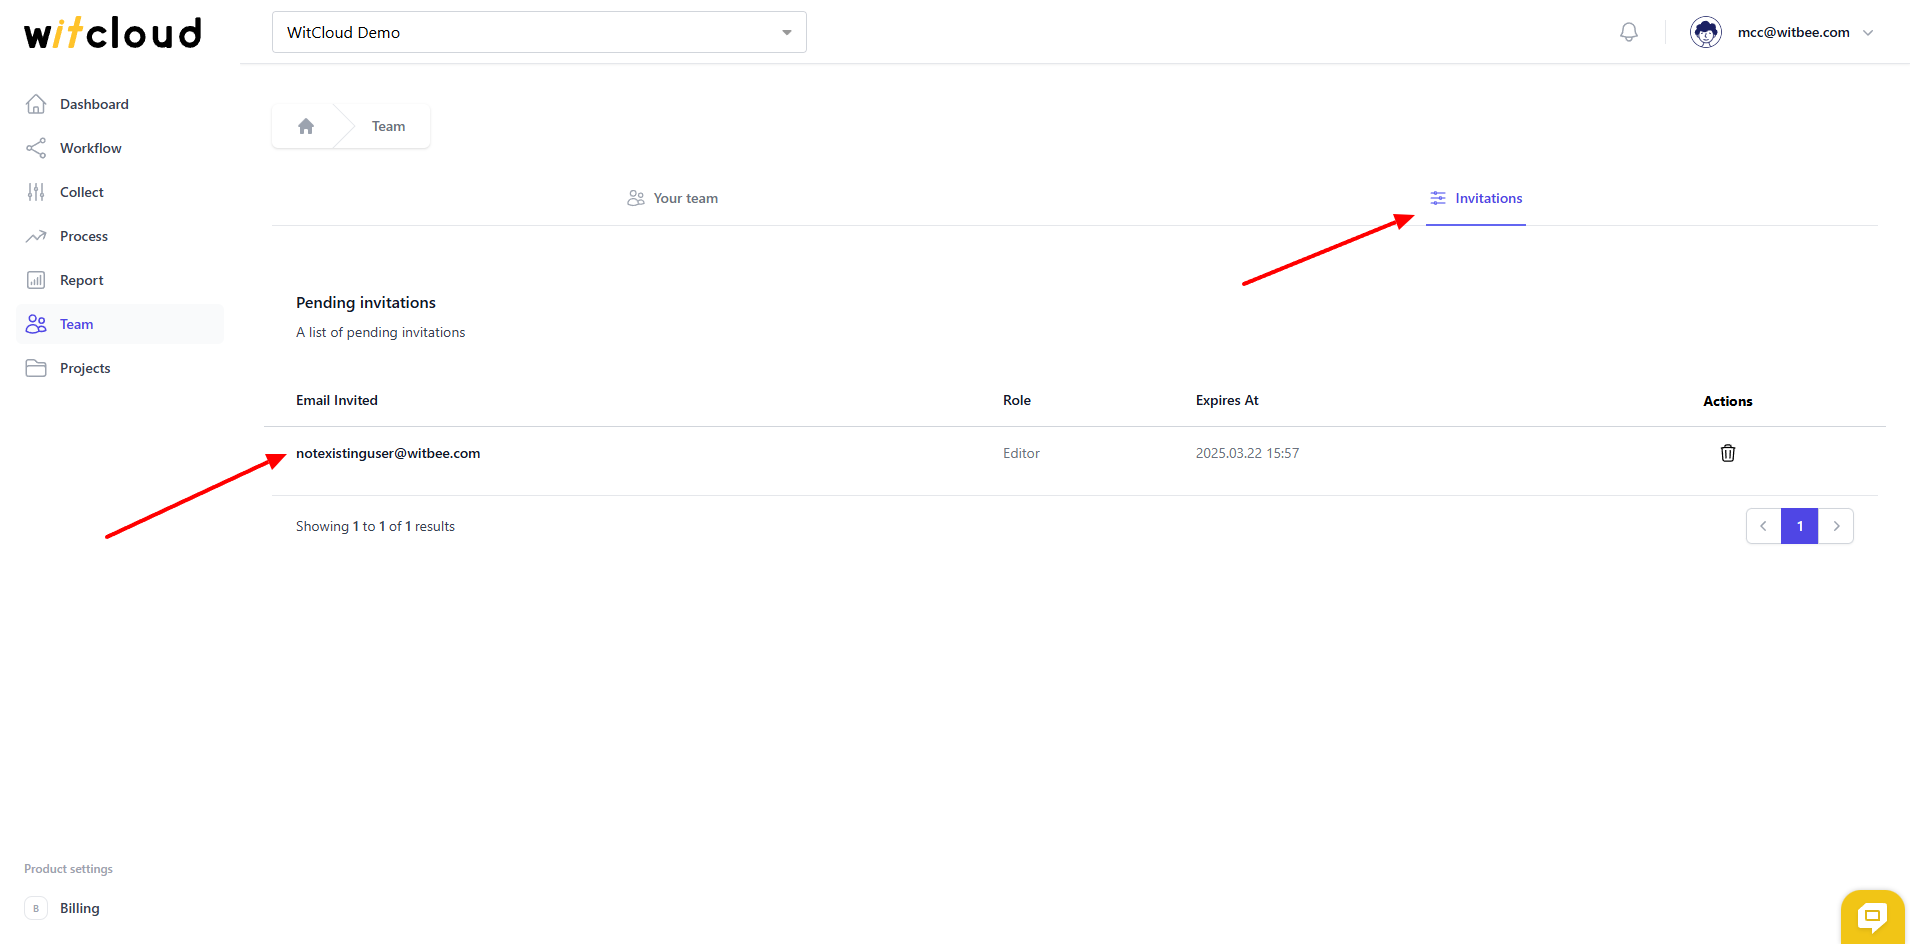
📩 Managing Invitations
You can view all sent invitations in the Team > Invitations tab. There, you can also remove an invitation or check if the user has created an account.
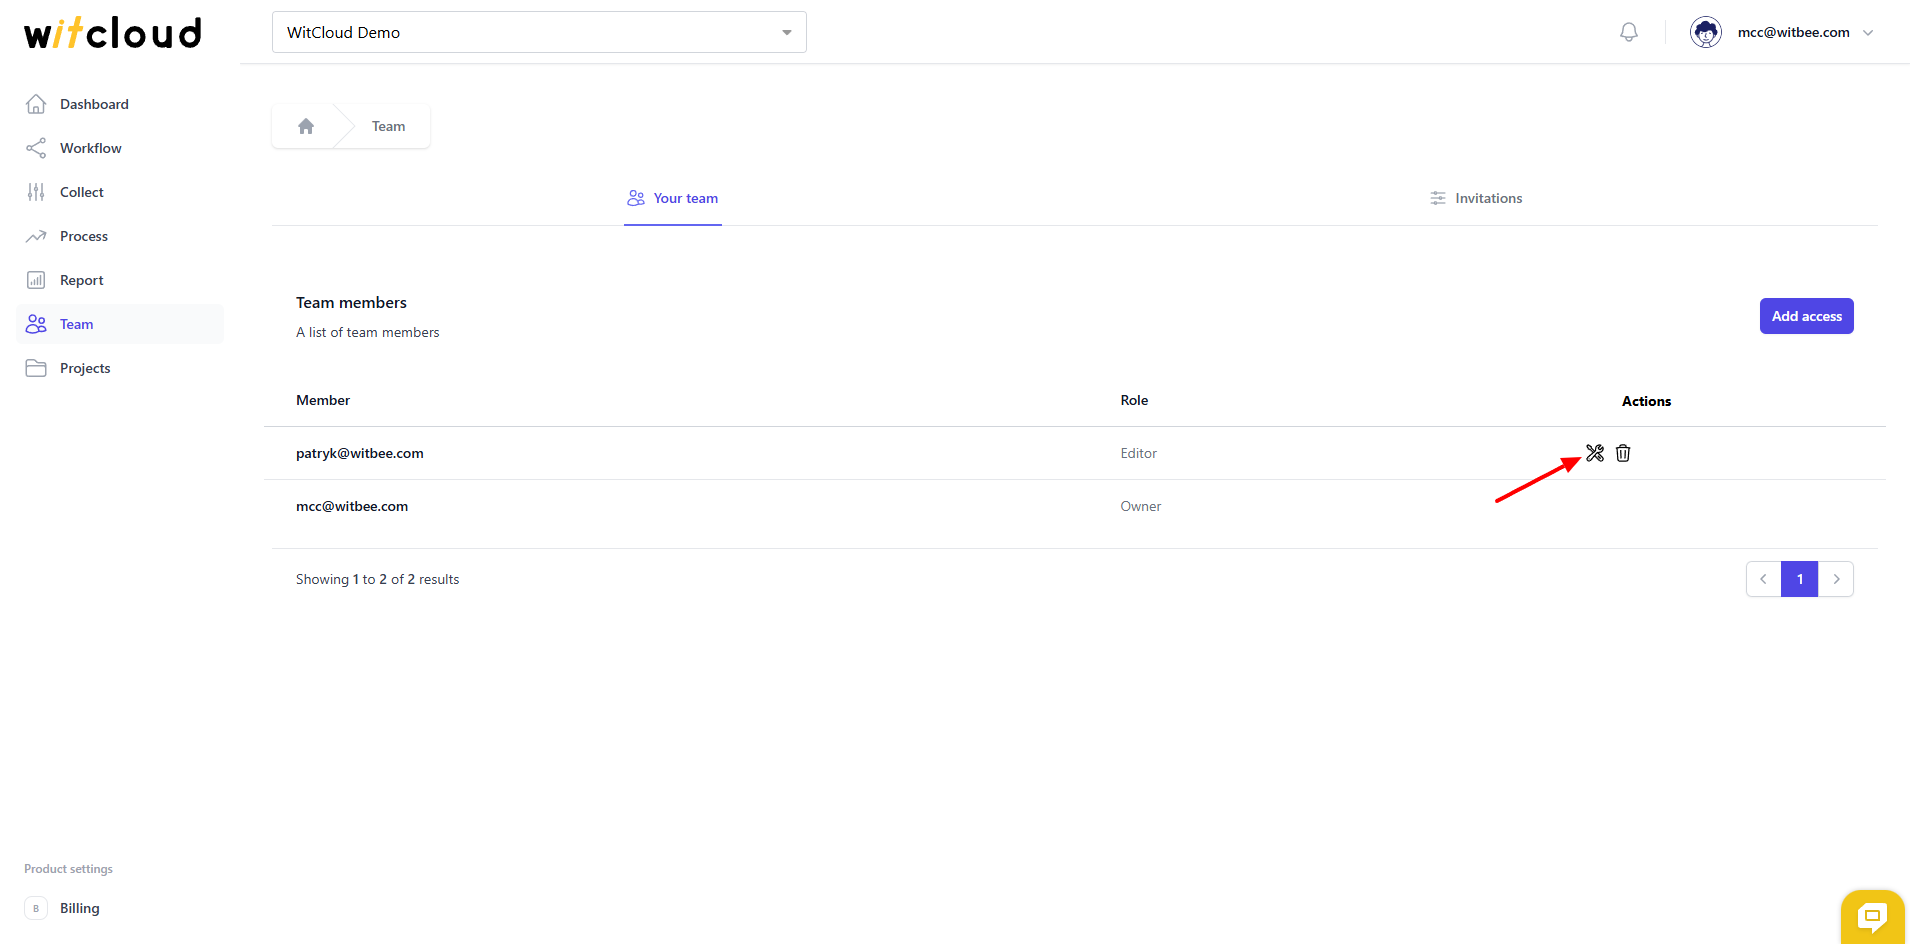
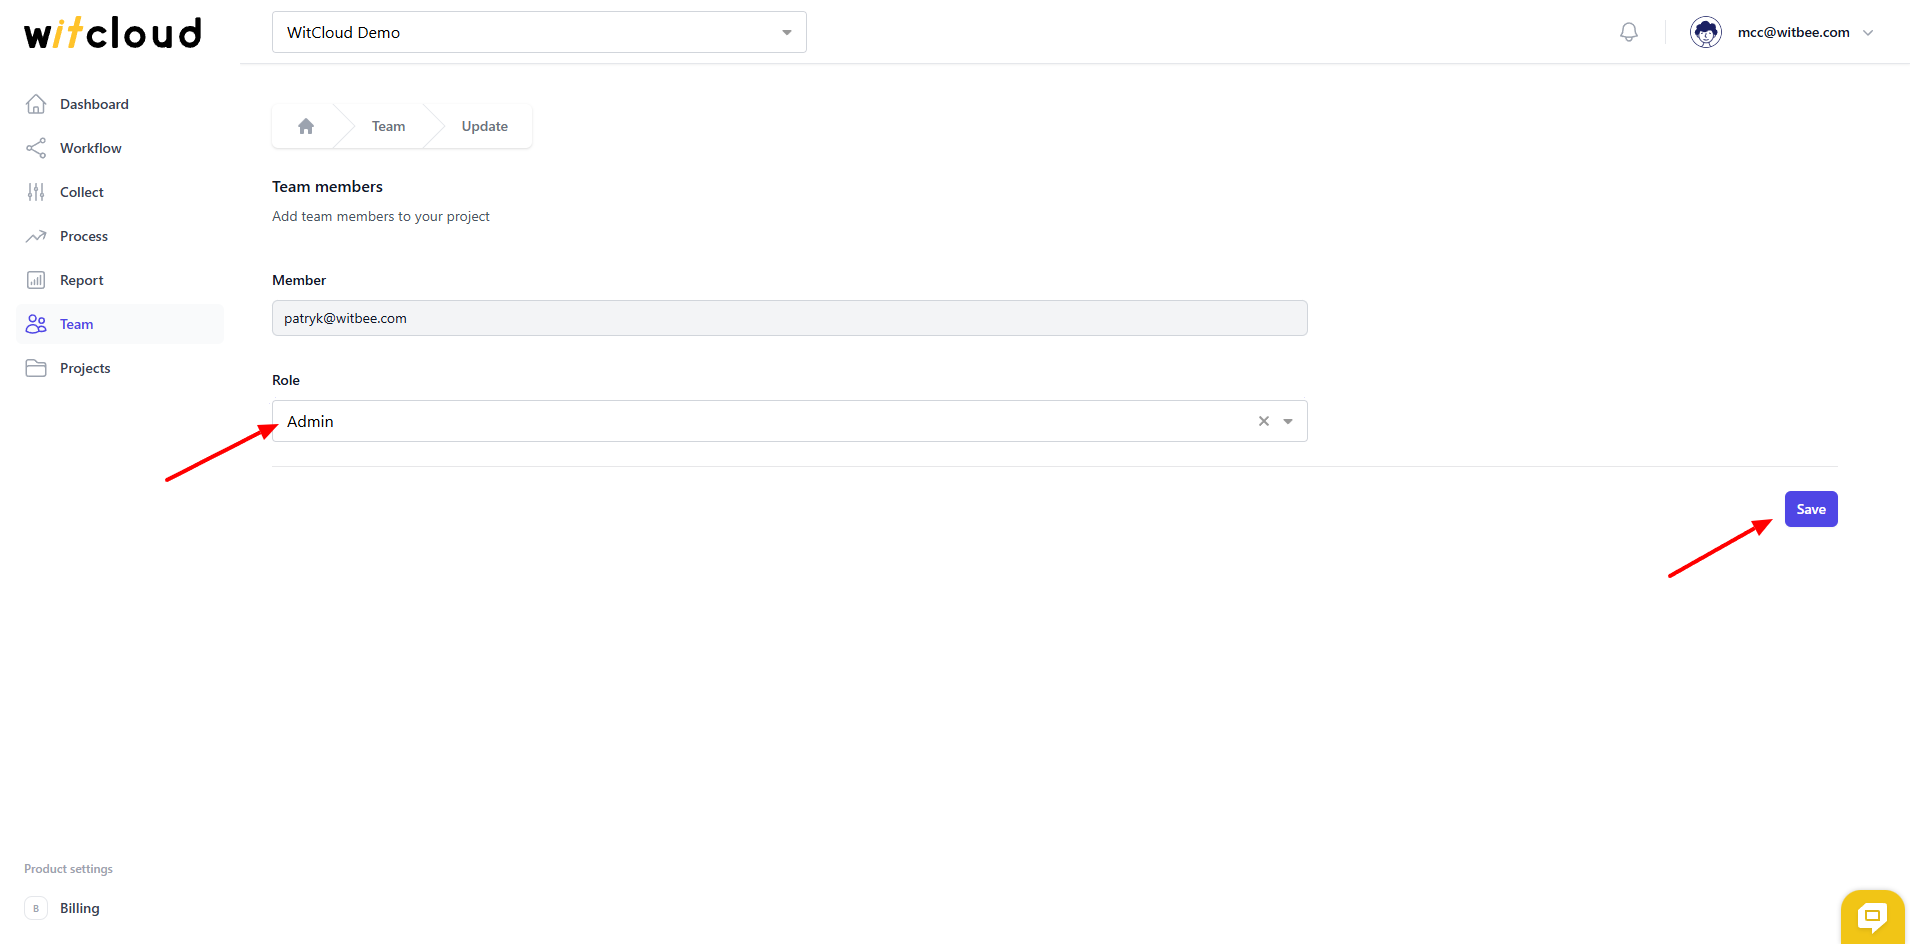
🔧 Editing Access
If you need to change a user's assigned role:
Click the edit icon next to the user in the access list.
Select the new role and confirm by clicking Save.
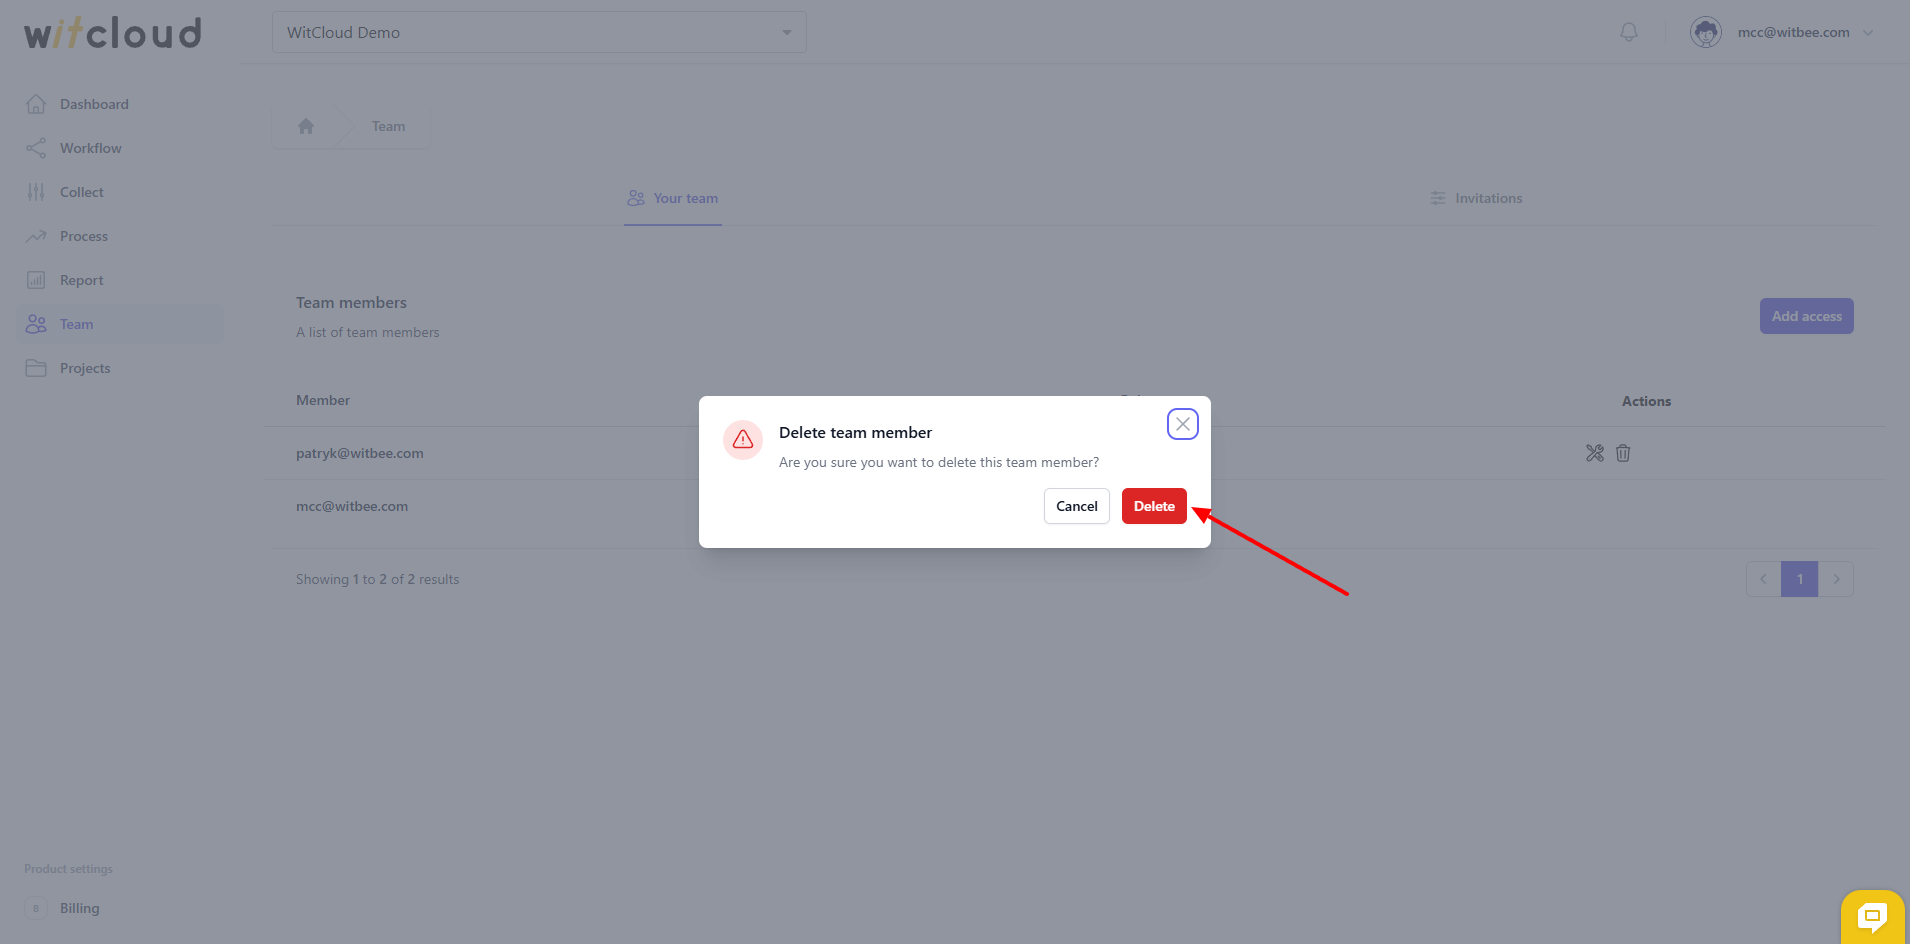
❌ Removing Access
To revoke a user's access:
Click the trash bin icon next to the appropriate user in the access list.

Confirm the action by clicking Delete in the pop-up window.