
All in One settings
Turn All in One on or off for a project, set its currency, timezone, session model and processing delay, and add your own columns and rows to the All in One table.
Updated
These settings control how All in One processes the data of the current project: whether it runs, which currency and timezone it uses, how sessions are counted and how long it waits before processing new data. Two more tabs let you add your own columns and your own rows to the All in One table.
Where to find it
Go to Admin settings > All In One.
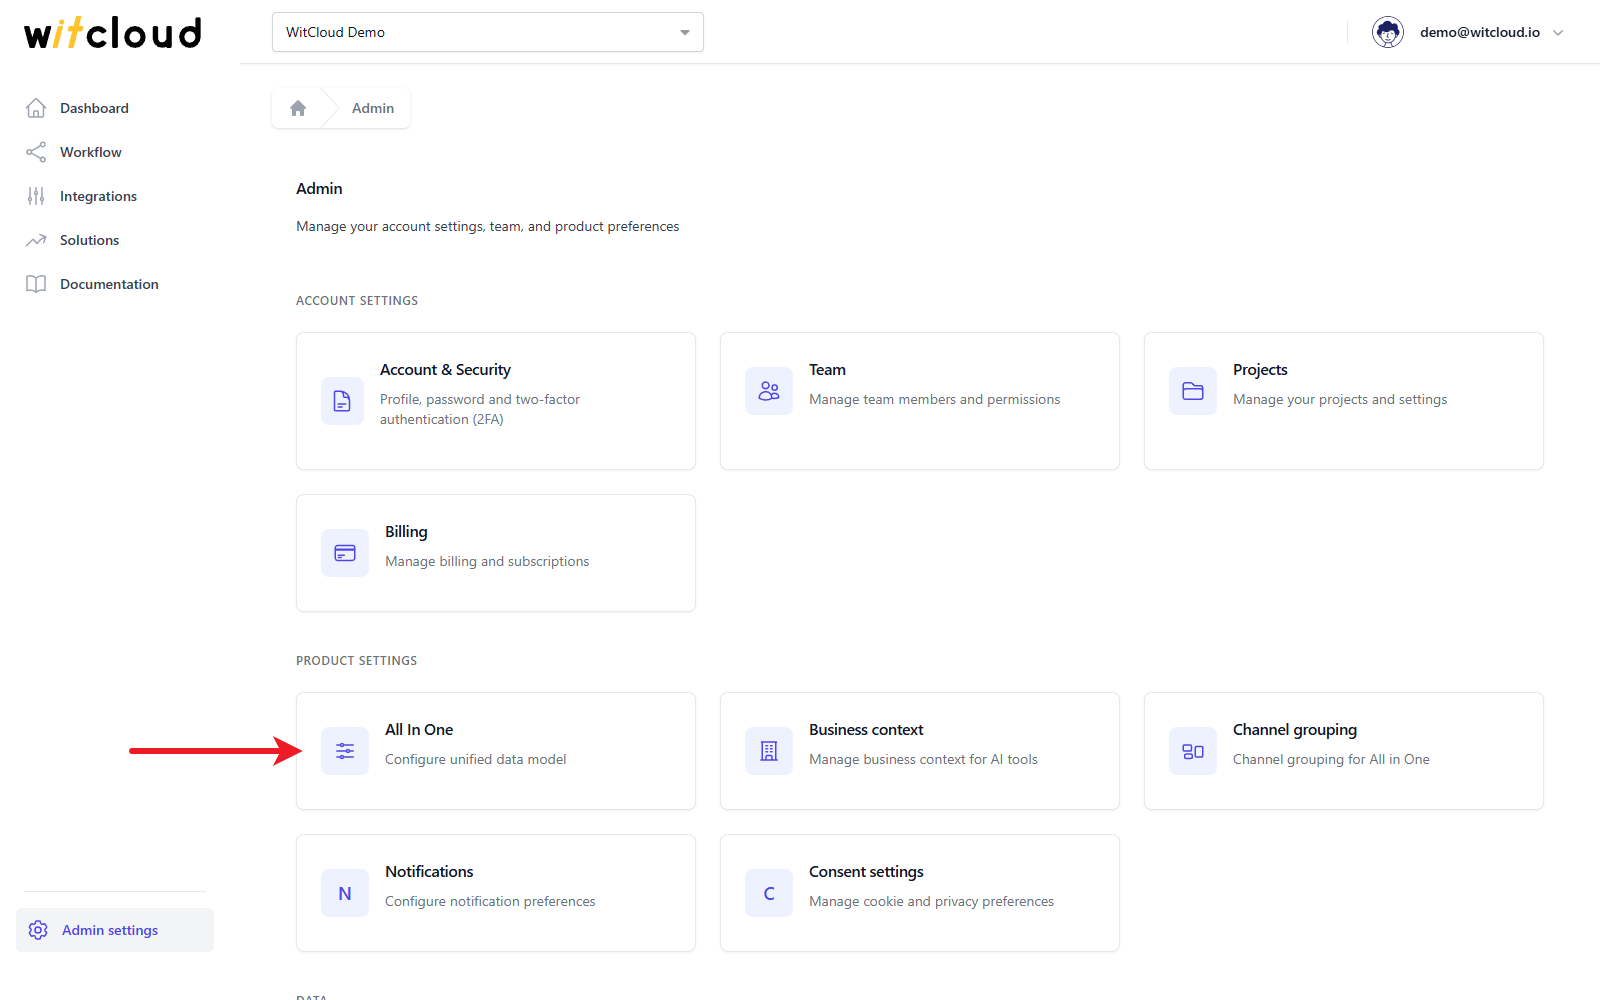
You get to the same screen from Solutions: click All in One (AIO) on the list of configured solutions.
Only the Owner, Admins and Editors can open and change these settings (roles).
Settings
The Settings tab holds the project's All in One settings. Change what you need and click Save.
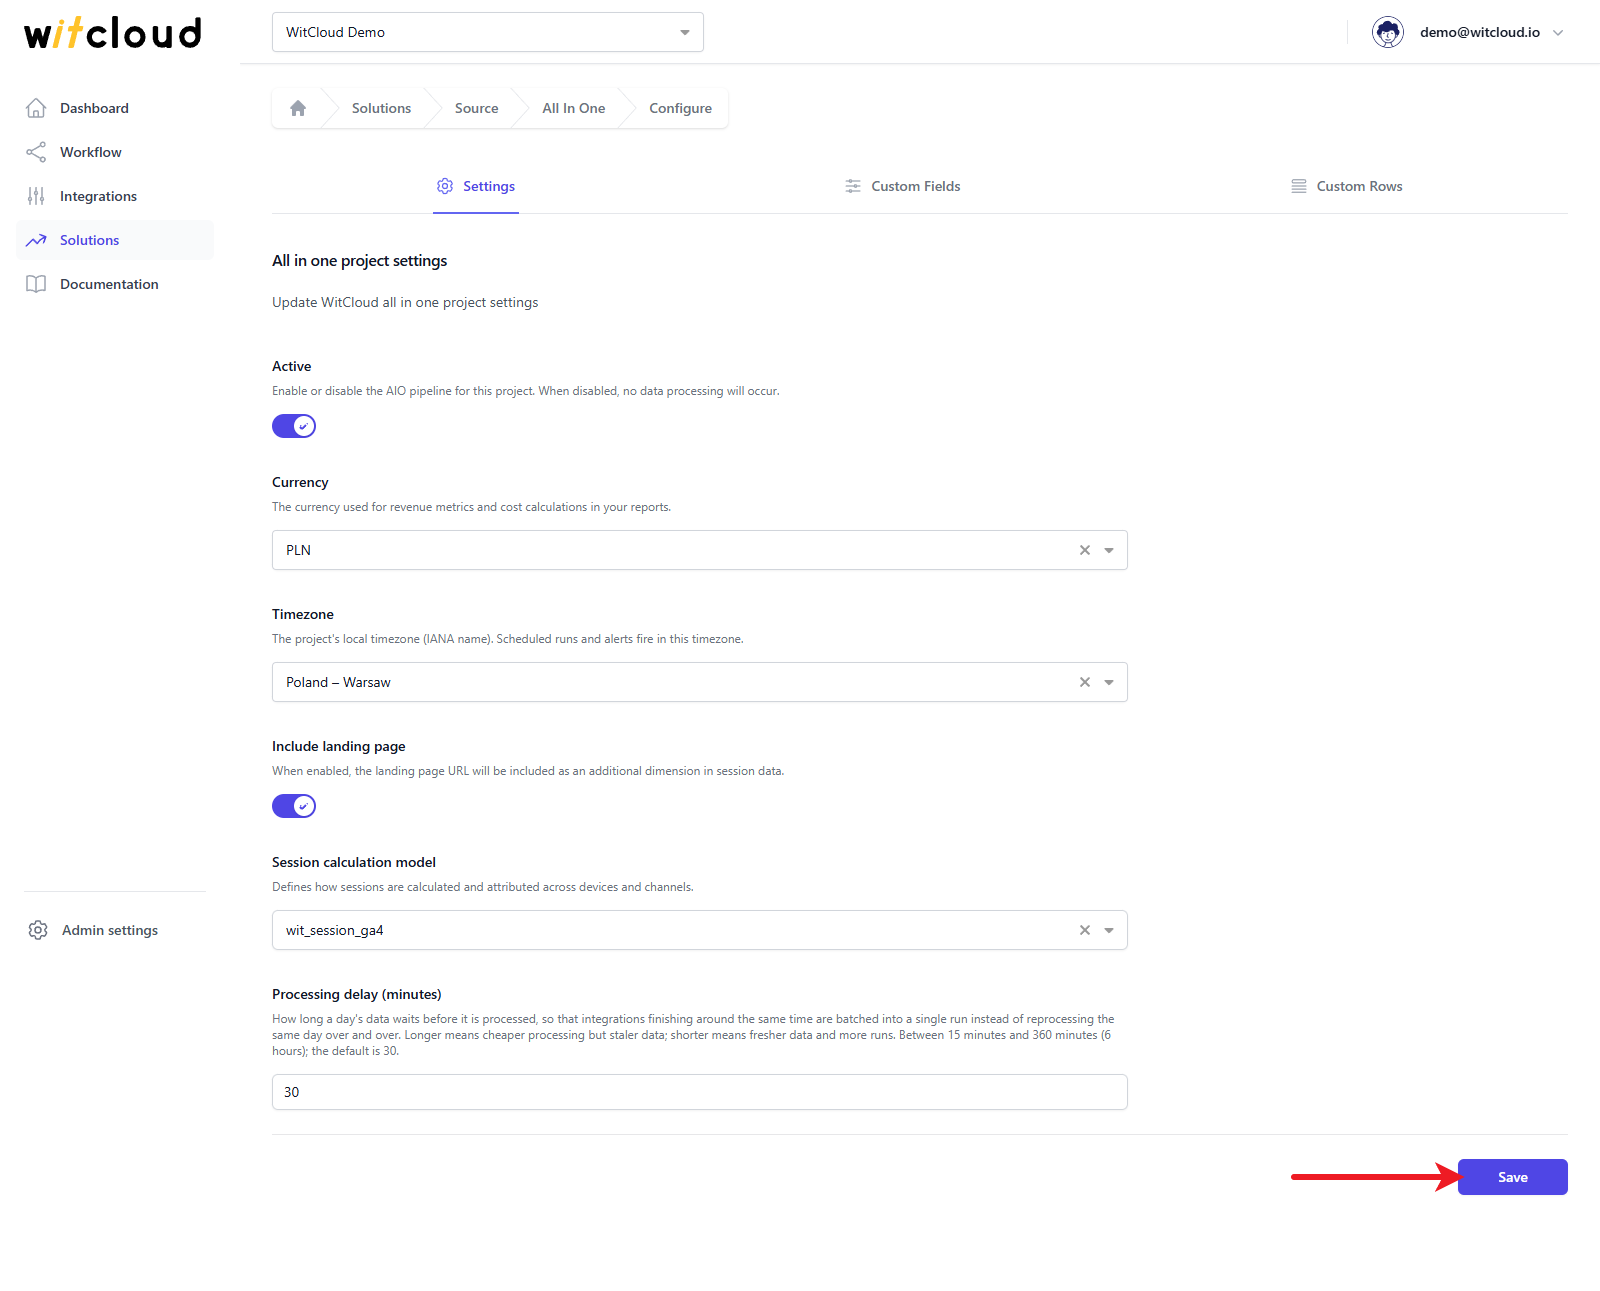
| Setting | What it does |
|---|---|
| Active | Turns the All in One processing for this project on or off. When it is off, no data is processed. |
| Currency | The currency used for revenue metrics and cost calculations in your reports. |
| Timezone | The project's local timezone. Scheduled runs and alerts fire in this timezone. |
| Include landing page | Adds the landing page URL as an extra dimension in session data. |
| Session calculation model | How Google Analytics 4 sessions are counted and attributed — see below. |
| Processing delay (minutes) | How long a day's data waits before it is processed, from 15 to 360 minutes (6 hours). The default is 30. |
Session calculation model
The model decides which events of your Google Analytics 4 data form one session, and so how sessions and their traffic sources are counted.
| Model | Sessions |
|---|---|
| wit_session_ga4 | Sessions as Google Analytics 4 counts them. |
| wit_session_ua_device | Sessions counted the way Universal Analytics did, separately on each device (browser or app): a new session starts after more than 30 minutes without activity, or when the traffic source changes — source, medium, campaign, term, content or Google Ads click. |
| wit_session_ua_cross_device | The same rules as wit_session_ua_device, but across devices: visits of one user from different devices that WitCloud links together are treated as one timeline. |
Processing delay
Every integration that brings in data for a day starts an All in One run for that day — after the processing delay. If another integration finishes the same day within that time, its data goes into the run that is already waiting instead of starting a second one. A longer delay means fewer runs and cheaper processing, but the data is that much older when it arrives; a shorter delay means fresher data and more runs.
Custom fields
The Custom Fields tab maps columns from your own BigQuery tables to the custom columns of the All in One table: five dimensions (custom_dimension1 to custom_dimension5) and five metrics (custom_metric1 to custom_metric5). Available slots at the bottom shows how many of each are taken.
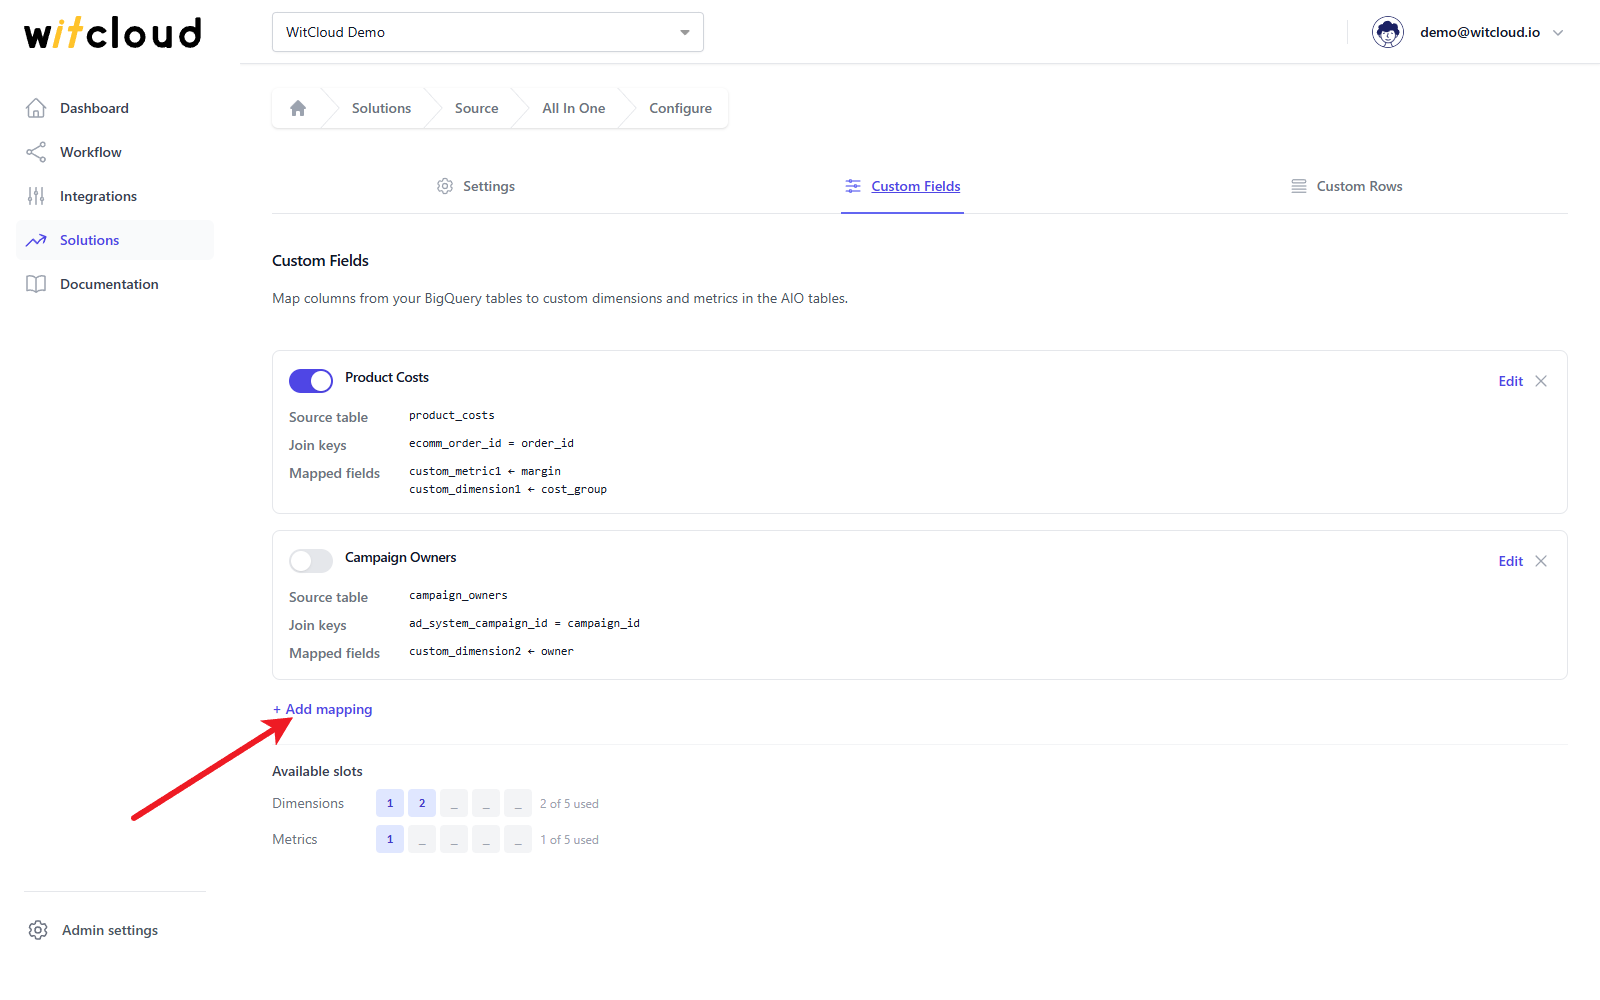
Add a mapping
Click + Add mapping.
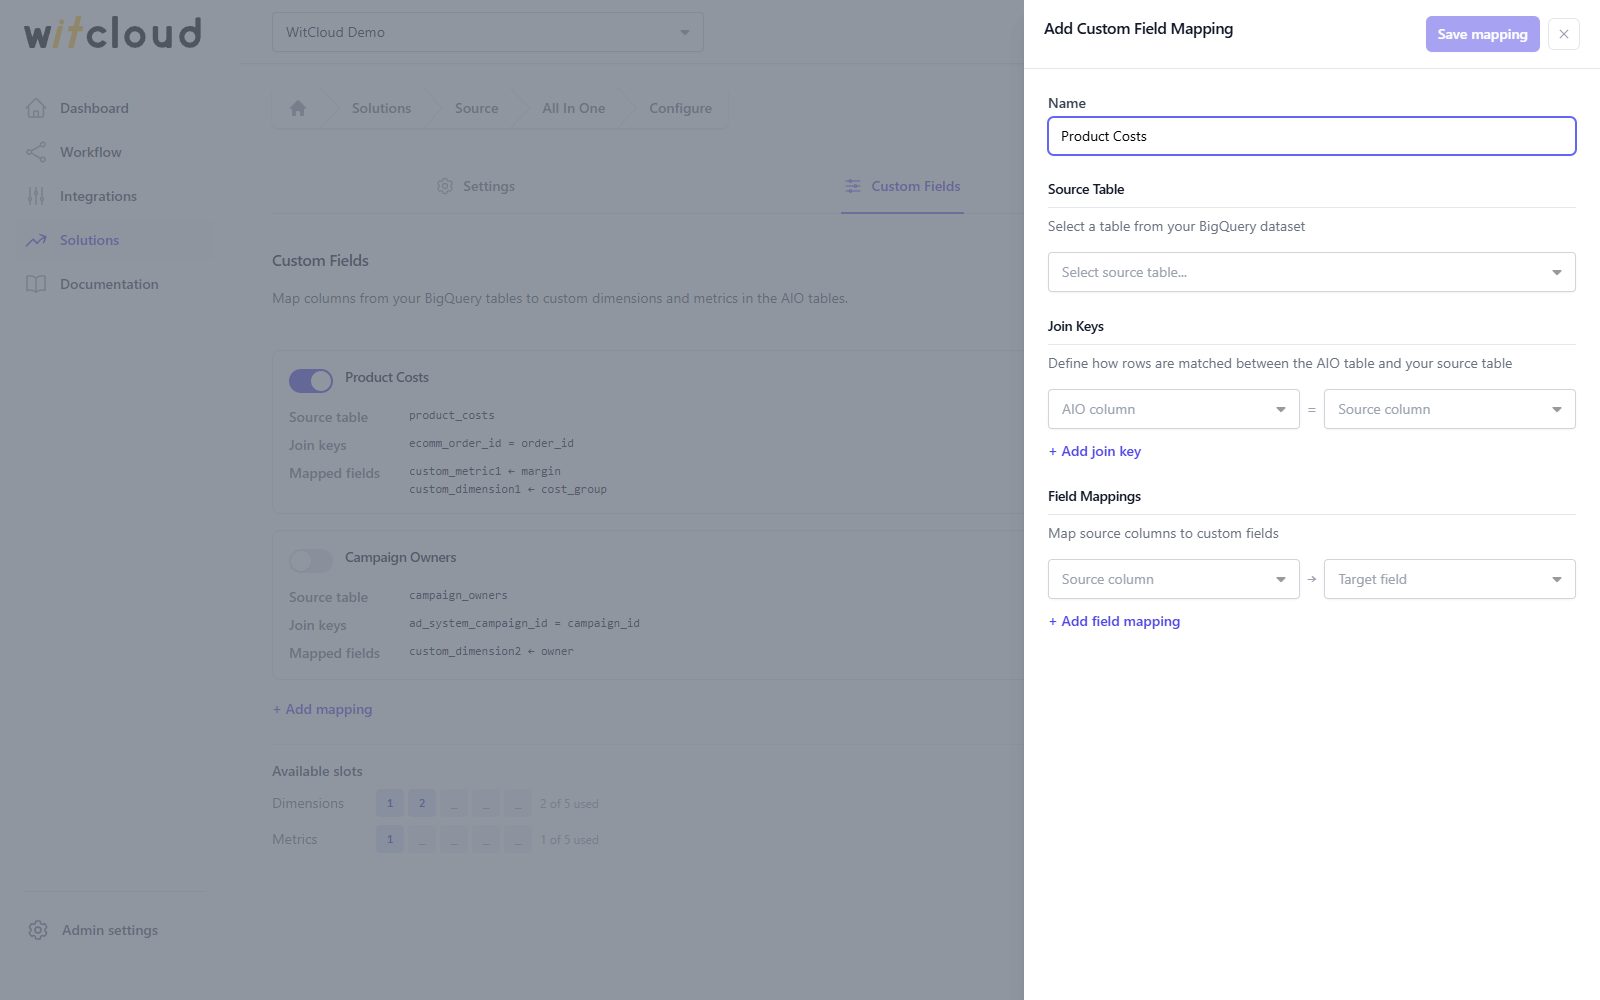
- Name — a name for the mapping, for example Product Costs.
- Source Table — the table in your BigQuery dataset the values come from.
- Join Keys — how rows are matched: pick an AIO column and the Source column that holds the same value. Click + Add join key to match on more than one column.
- Field Mappings — pick a Source column and the Target field it fills. Click + Add field mapping for more.
Click Save mapping.
The panel warns you when the types do not fit — a join key whose two columns have different types, or a metric filled from a column that is not numeric. Each target field can be used by one mapping only.
Every All in One run fills the mapped columns for the days it processes. Where the source table has no matching row, the column keeps its value from All in One.
Change, pause or delete a mapping
- Click Edit to change a mapping, then Update mapping.
- Use the switch next to the name to pause a mapping without deleting it. Paused mappings are skipped in the next runs.
- Click the × icon and confirm with Delete to remove a mapping. This cannot be undone.
Custom rows
The Custom Rows tab adds rows to the All in One table from your own SQL queries — for example offline conversions that no integration collects.
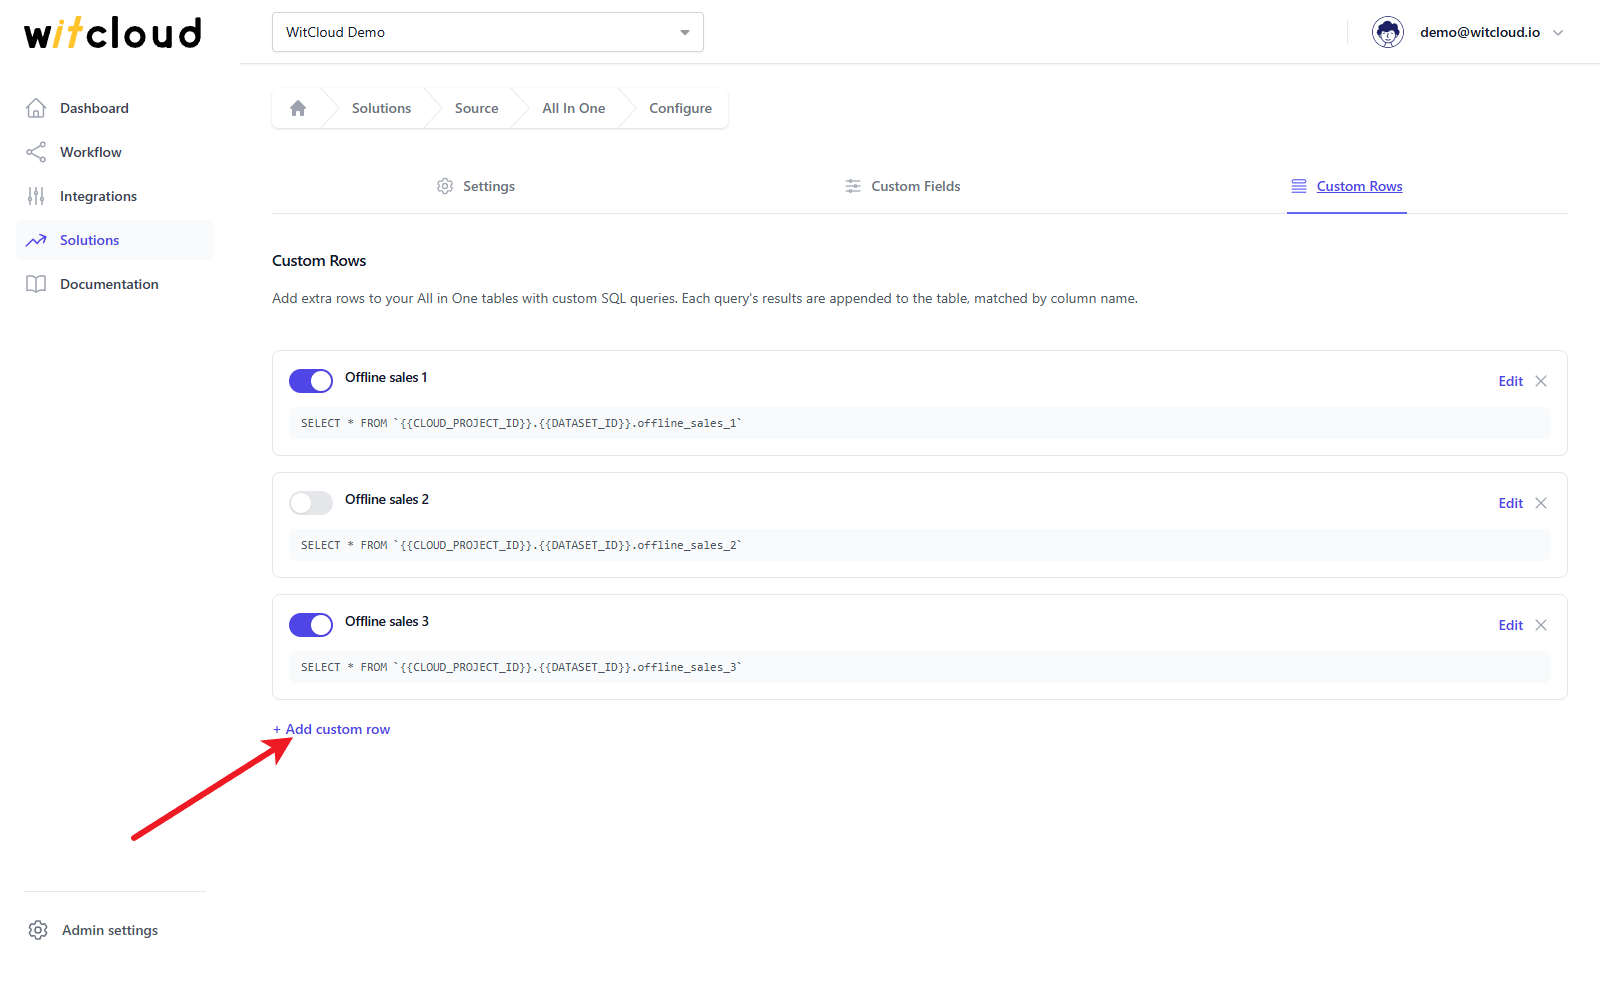
Add a custom row
Click + Add custom row.
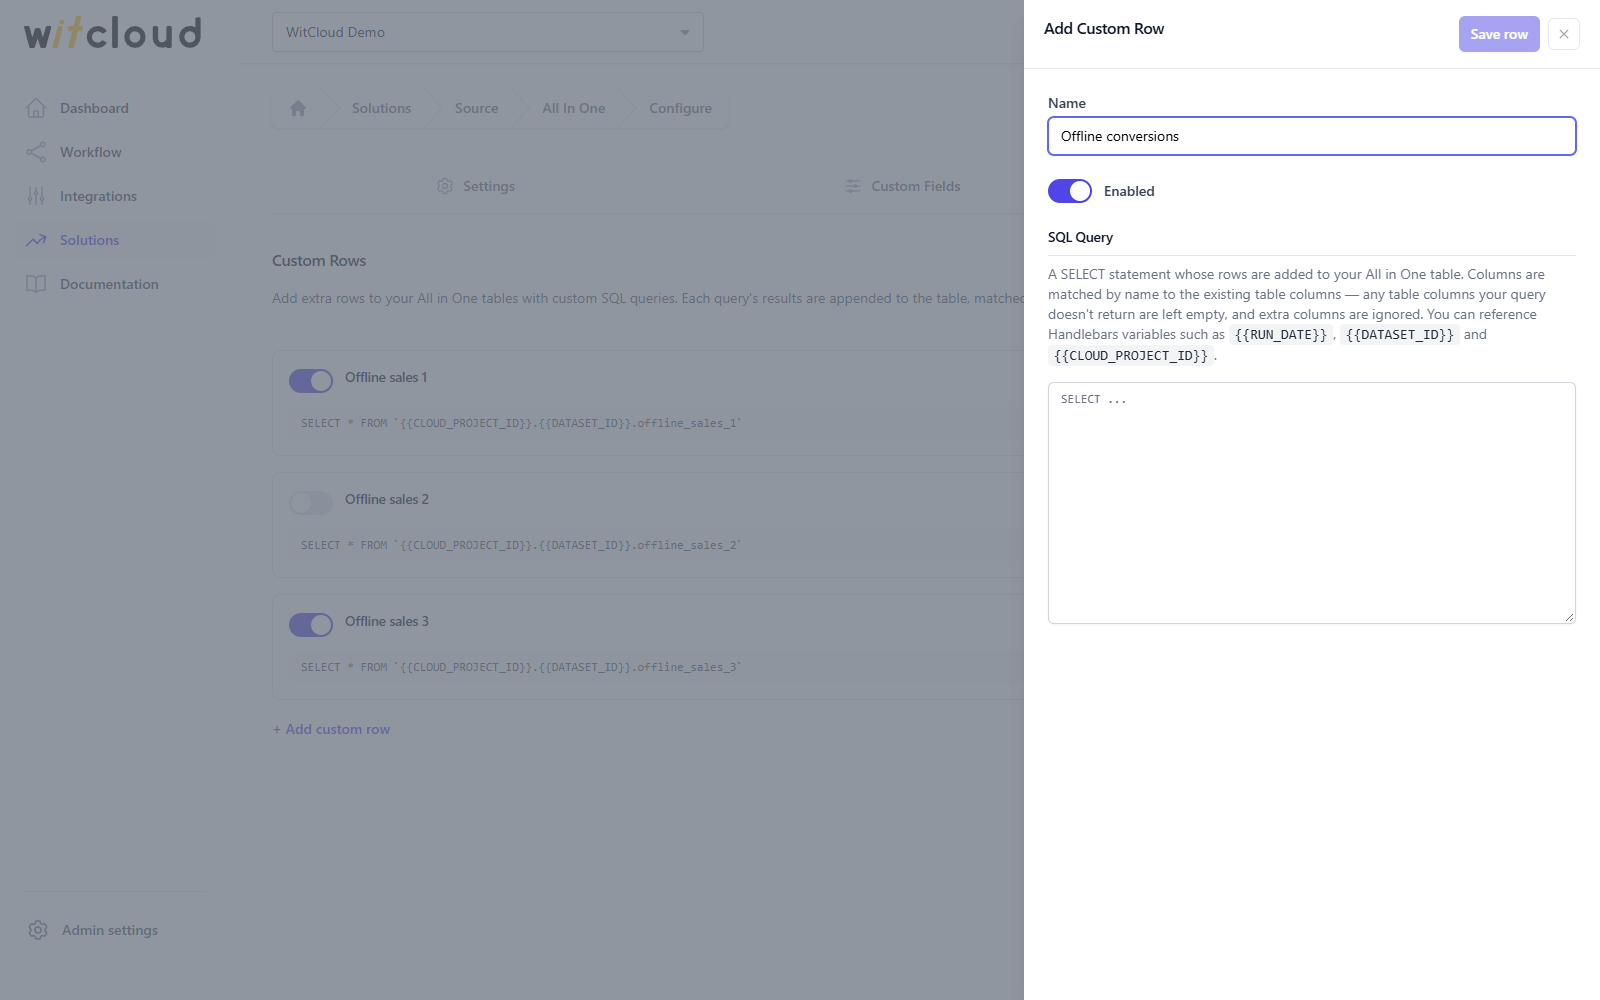
- Name — a name for the query, for example Offline conversions.
- Enabled — on by default; switch it off to save the query without running it.
- SQL Query — a
SELECTstatement whose rows are added to the table.
Click Save row.
Columns are matched by name: table columns your query does not return stay empty, and columns
the table does not have are ignored. You can use the variables {{RUN_DATE}},
{{DATASET_ID}} and {{CLOUD_PROJECT_ID}} in the query.
Custom rows are added before the custom fields are filled, so your custom fields also apply to them.
If a query fails, that run still refreshes the table — just without the custom rows.
Change, pause or delete a custom row
- Click Edit to change the query, then Update row.
- Use the switch next to the name to pause a row without deleting it.
- Click the × icon and confirm with Delete to remove it. This cannot be undone.
Troubleshooting
Target fields already used by other mappings
Another mapping already fills that custom column. Pick a free one — Available slots shows which — or remove it from the other mapping first.
Duplicate target fields within mapping
The same target field is picked twice in one mapping. Each target field can be filled only once.