
Channel grouping
Sort your data into named channels — marketing channels, markets or your own groupings — for All in One, KPI Tree and solution outputs.
Updated
A channel grouping sorts your data into named channels by rules you define — for example Paid Search, Email or Organic Social, or one channel per market. All in One writes the channel of every row into its own column, so you can use the groupings in analyses, the KPI Tree and solution outputs.
Where to find it
Go to Admin settings > Channel grouping.
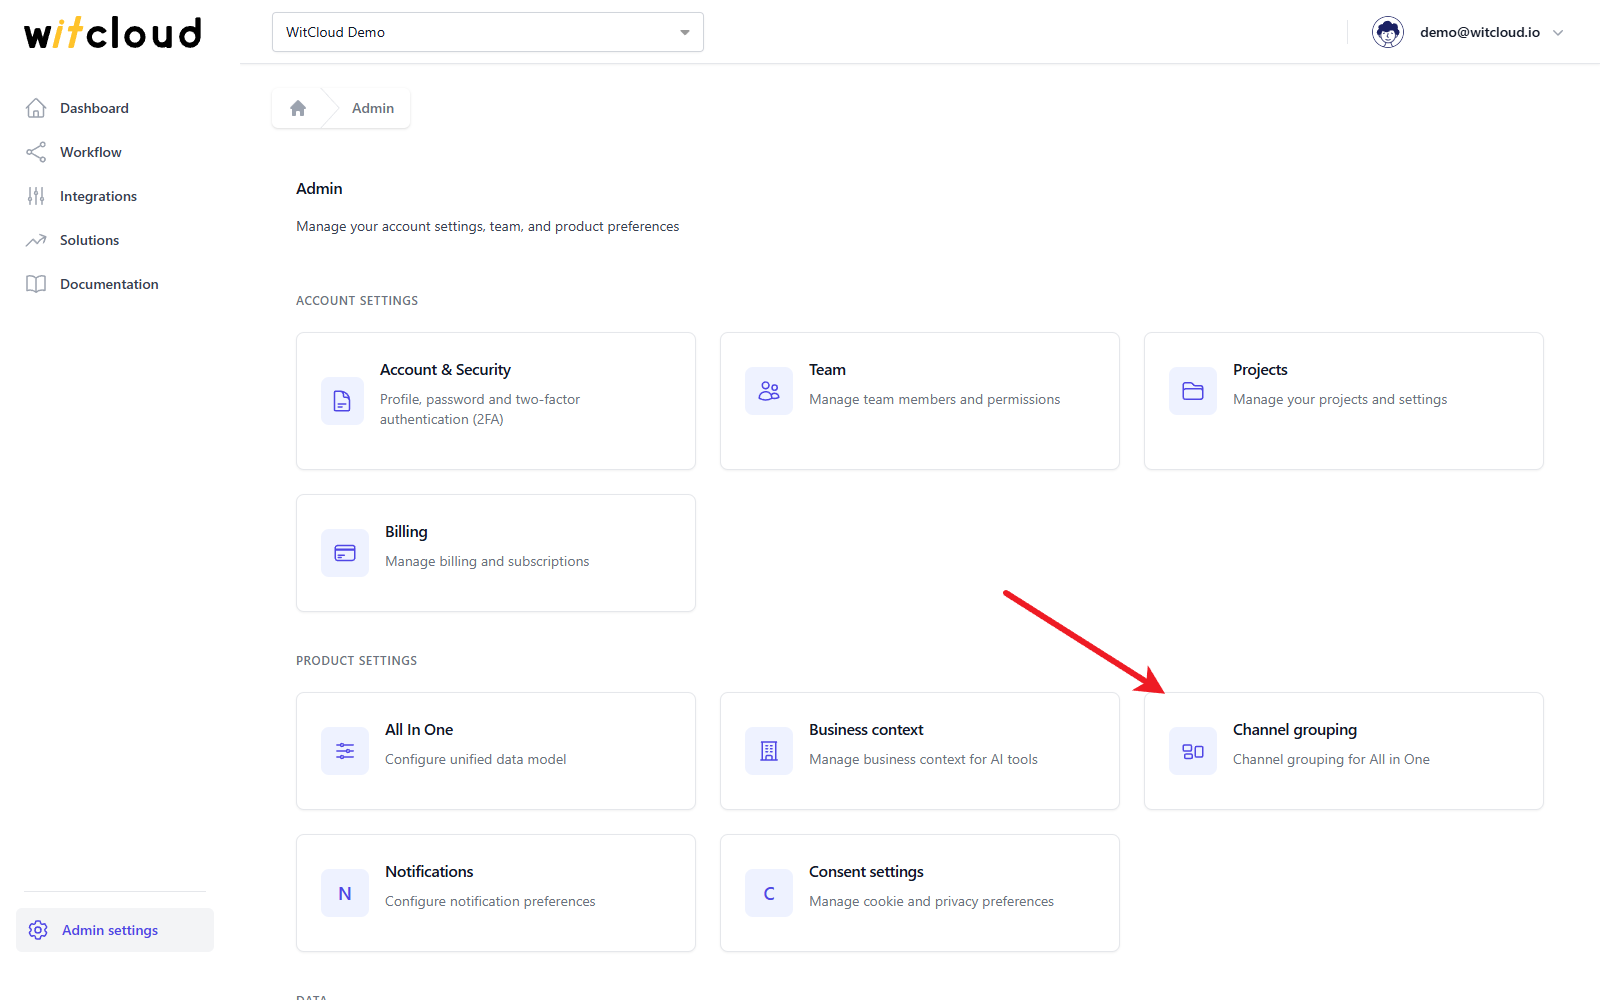
Everyone in the project can see the groupings; only the Owner, Admins and Editors can change them (roles).
Default and custom groupings
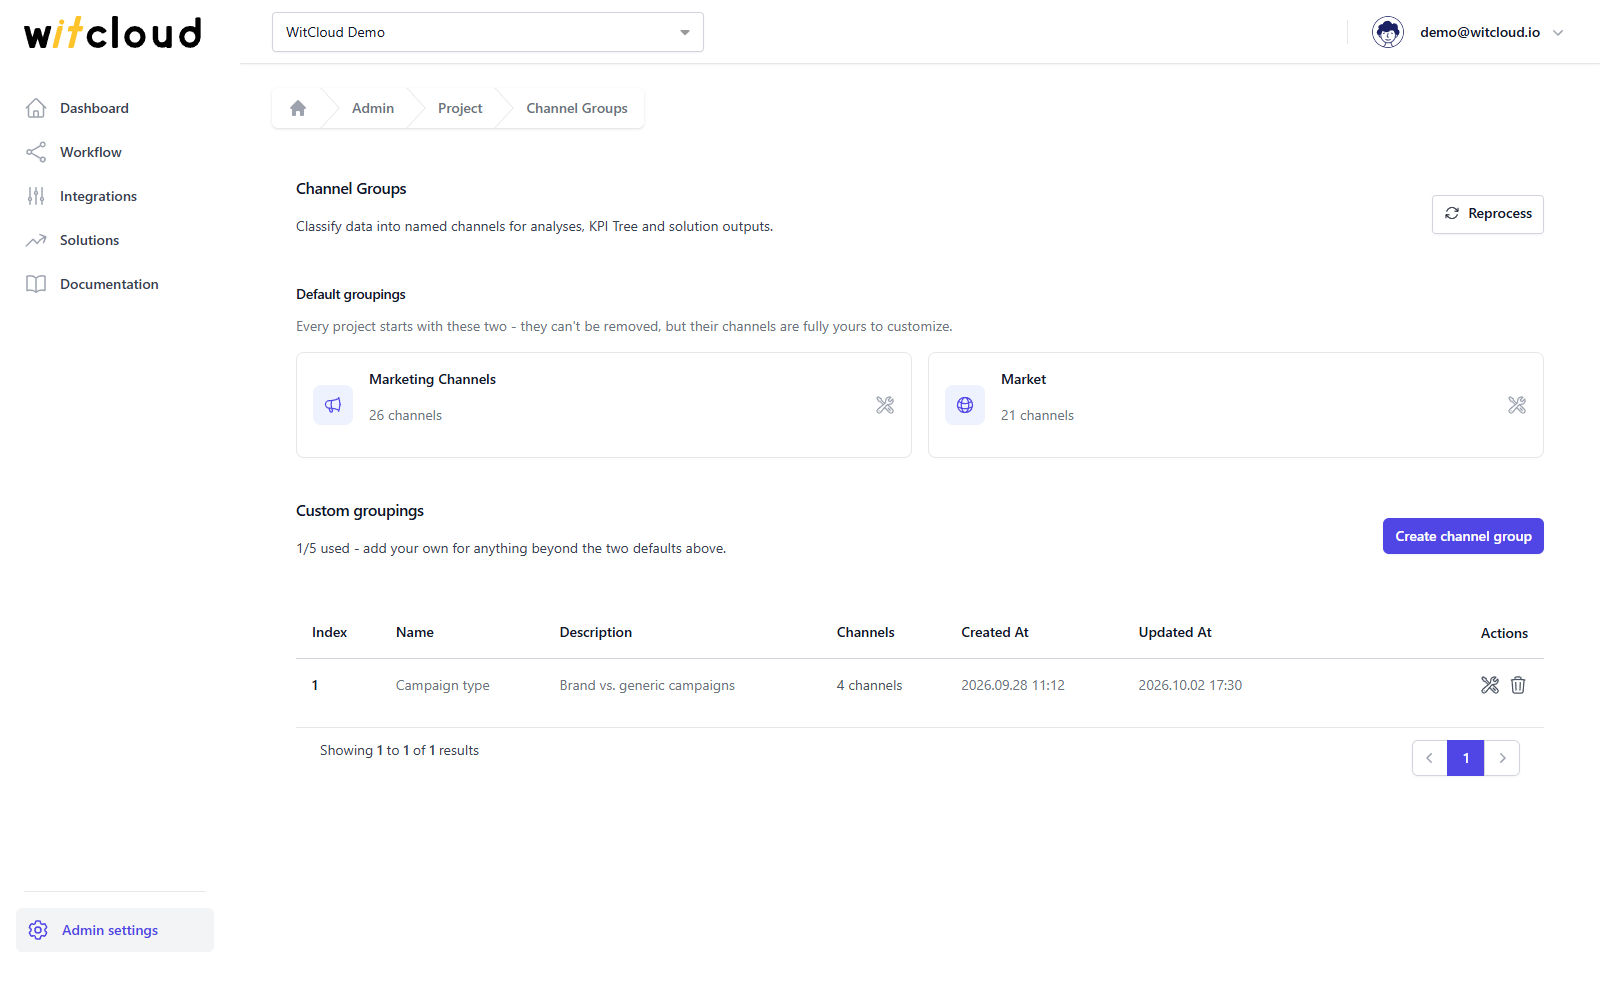
Every project has two Default groupings. They cannot be removed or renamed, but you can change their channels freely:
| Grouping | What it is for | All in One column |
|---|---|---|
| Marketing Channels | Standard marketing channels, filled with ready-made rules. | default_channel_grouping |
| Market | Markets — shops, countries or ad accounts — for projects that sell in several markets. Starts empty. | default_market_grouping |
Under Custom groupings you can add up to 5 more. Each one gets its own column,
channel_grouping1 to channel_grouping5.
Create a custom grouping
- Click Create channel group.
- Enter a Group name and, optionally, a Description (optional).
- Click Save Group.
The grouping appears under Custom groupings. Open it with the edit icon to add channels.
When all 5 custom groupings are used, Create channel group is disabled.
Add and edit channels
Open a grouping with the edit icon. The Channel list shows its channels in order.
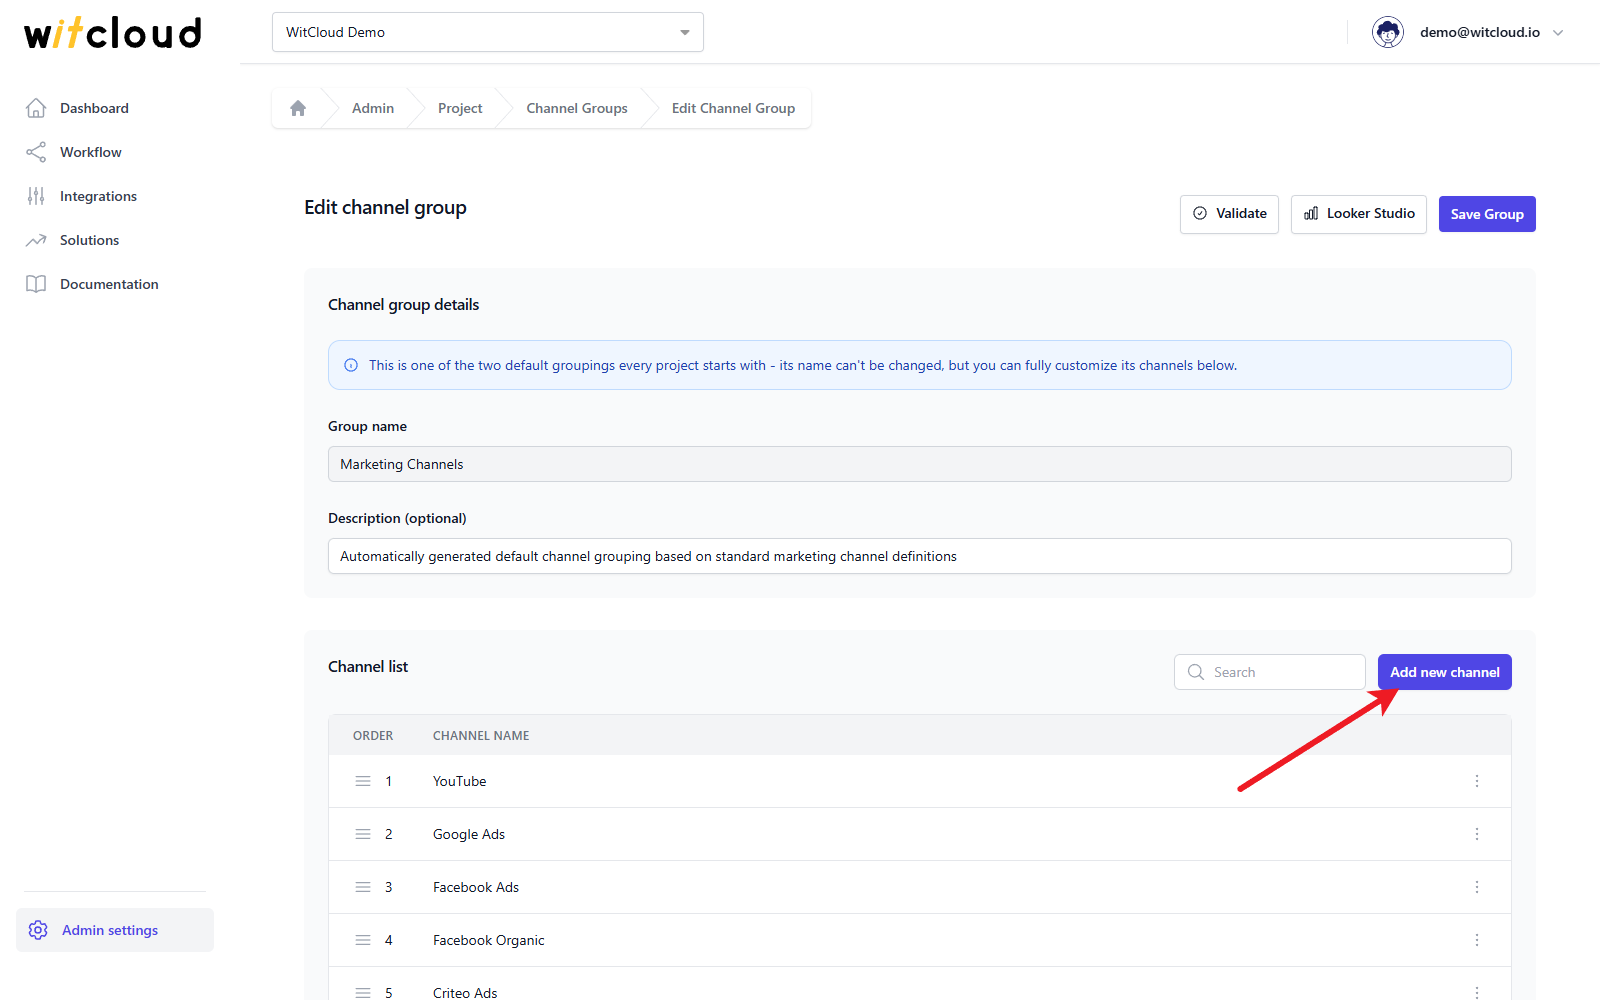
Click Add new channel, enter a Channel name and set the Channel conditions.
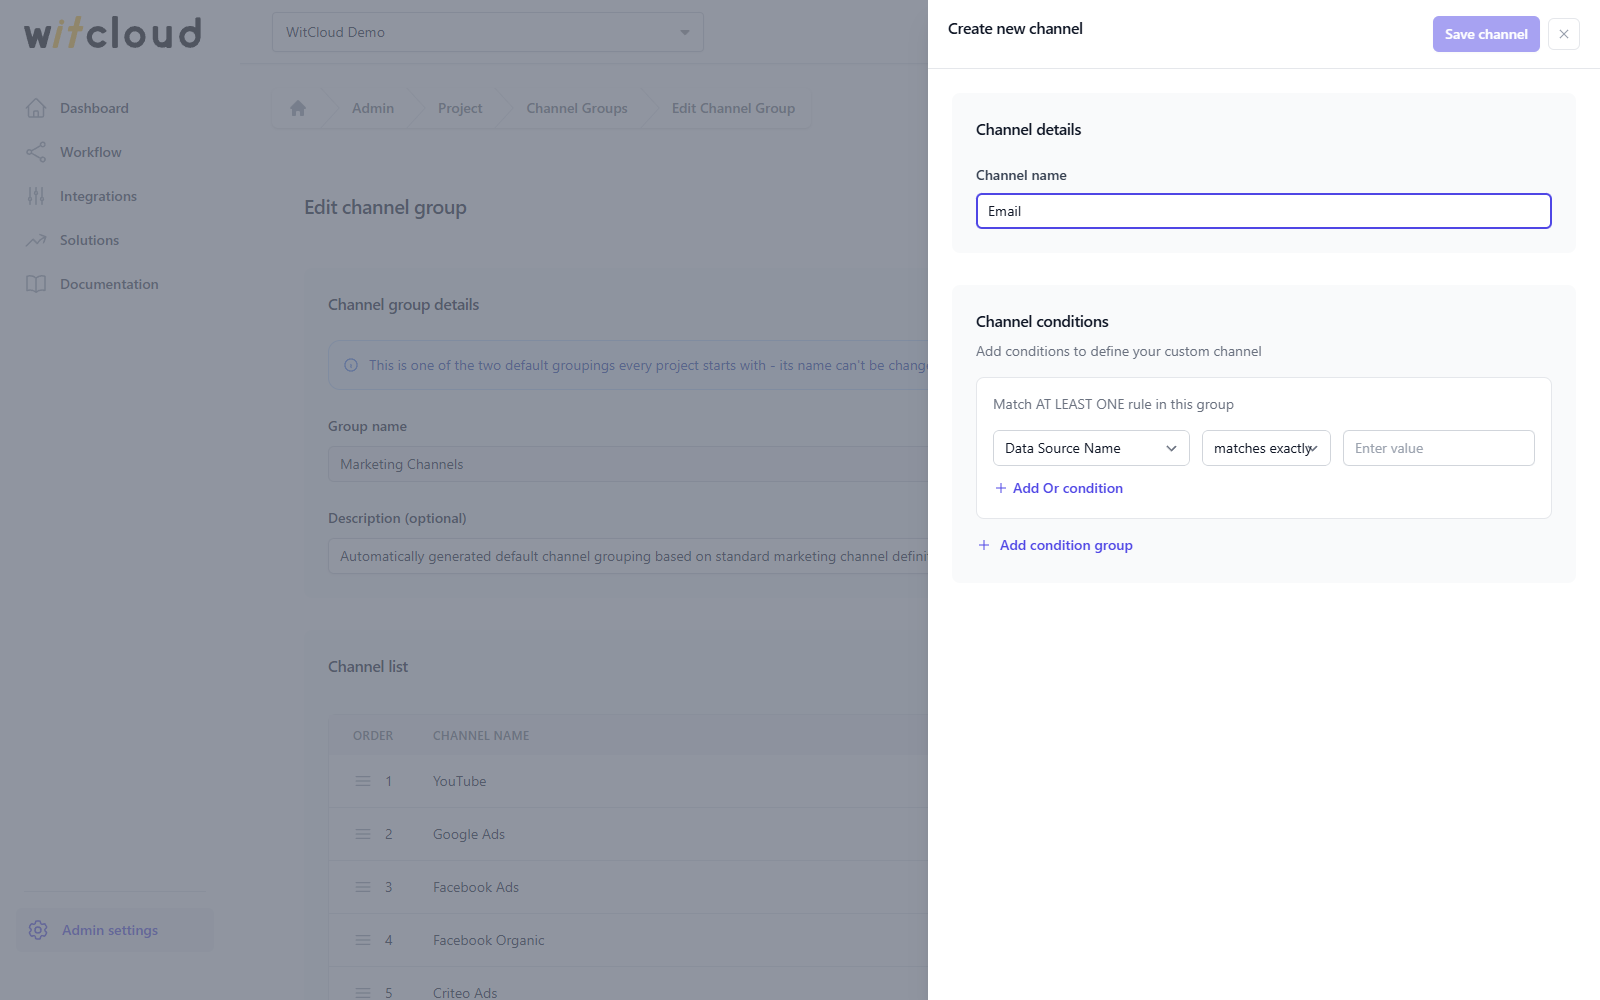
- A condition is a field, an operator and a value — for example GA Session Mediummatches exactly
cpc. - Match AT LEAST ONE rule in this group — the rules inside one group are joined with Or. Click Add Or condition to add a rule to the group.
- Click Add condition group for another group. Groups are joined with And: a row must match every group.
Click Save channel.
The fields you can use come from your data sources, Google Analytics sessions, ecommerce orders and ad systems — for example Data Source Name, GA Session Source, GA Session Campaign, GA Landing Page, Ecomm Shop Name or Ad System Campaign Name. The operators are contains, matches exactly, starts with, ends with, matches regex, does not contain and does not equal.
Order matters
Each row gets the first channel, from the top of the list, whose conditions it matches. Rows that match no channel get Other. Drag the channels by the handle to change their order.
To change or remove a channel, open the ⋮ menu next to it and choose Edit or Delete.
Check a grouping
In an existing grouping:
- Validate shows a preview of how your data is grouped with the current channels.
- Looker Studio gives you the grouping as a formula — copy it into a calculated field in Looker Studio.
Apply changes to past data
New channel rules apply to the data All in One processes from then on. To apply them to data that is already processed, click Reprocess on the groupings list. It re-runs all channel groupings at once.
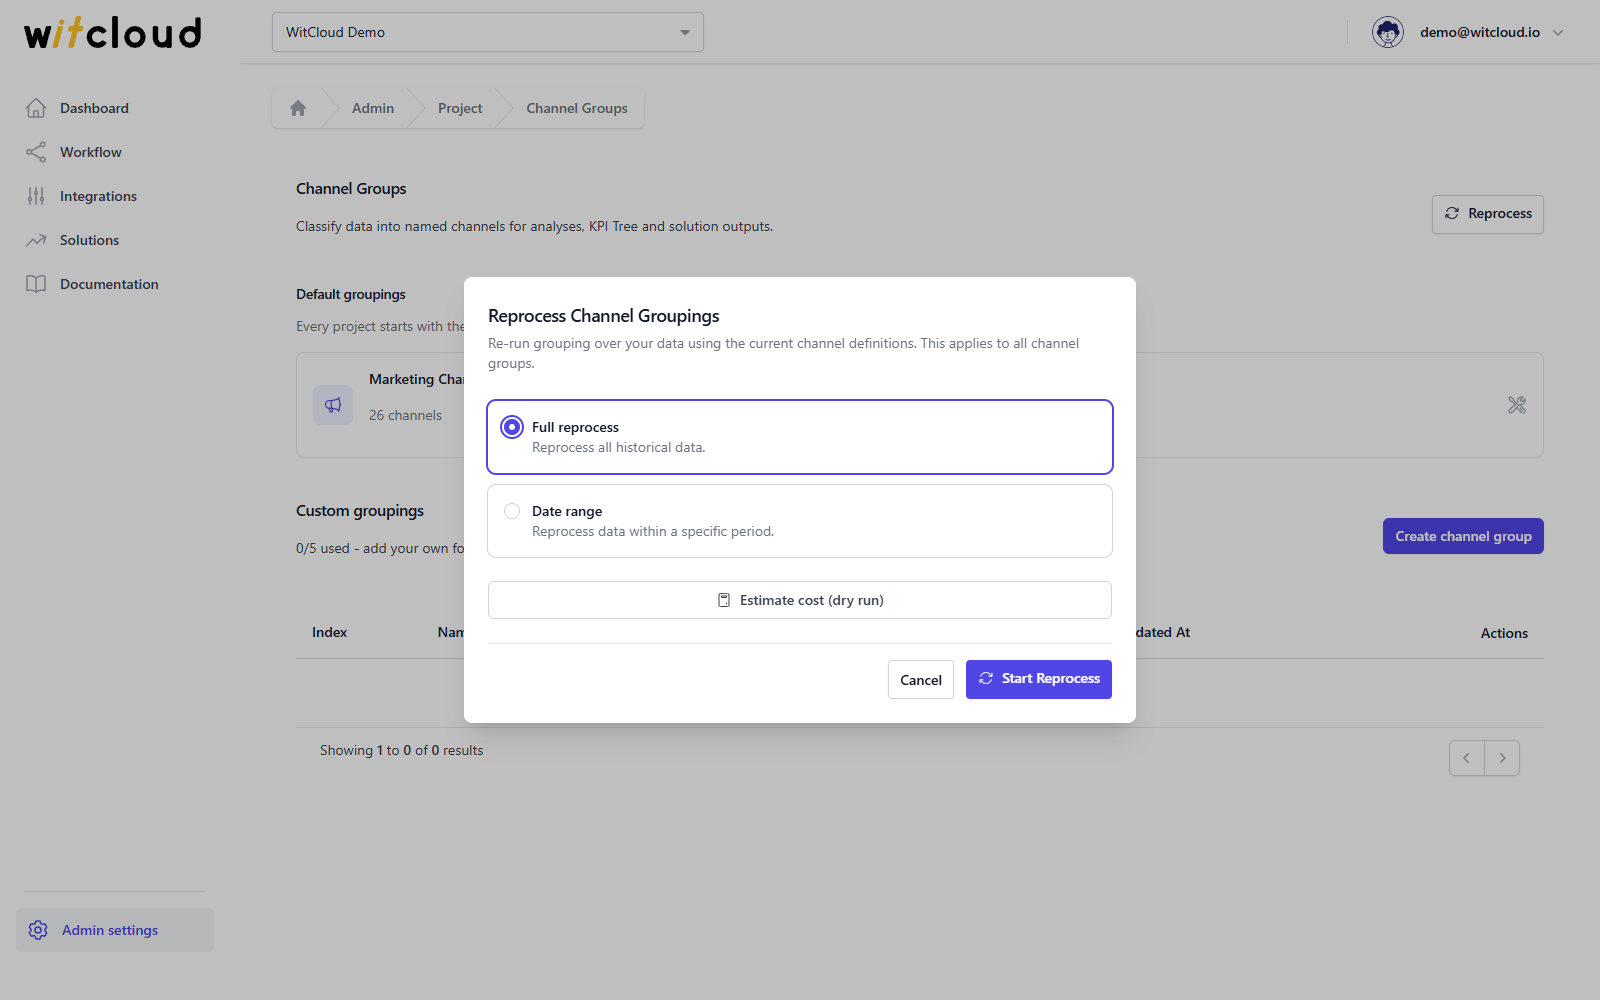
- Choose the Reprocess scope: Full reprocess for all historical data, or Date range with a Start date and an End date.
- Click Estimate cost (dry run) to see how much data the reprocess would process and its estimated cost.
- Click Start Reprocess.
Delete a custom grouping
Click the trash bin icon next to the grouping and confirm with Delete. This cannot be undone. The two default groupings cannot be deleted.
Troubleshooting
Cannot create more than 5 channel groupings
All 5 custom slots are taken. Delete a custom grouping you no longer need.
The name of a default channel grouping cannot be changed
Marketing Channels and Market keep their names. You can still change their channels.
AIO is not configured for this project
Validate and Reprocess work on All in One data. Set up All in One for the project first.